How to Crochet Shorts – Step-by-Step Guide
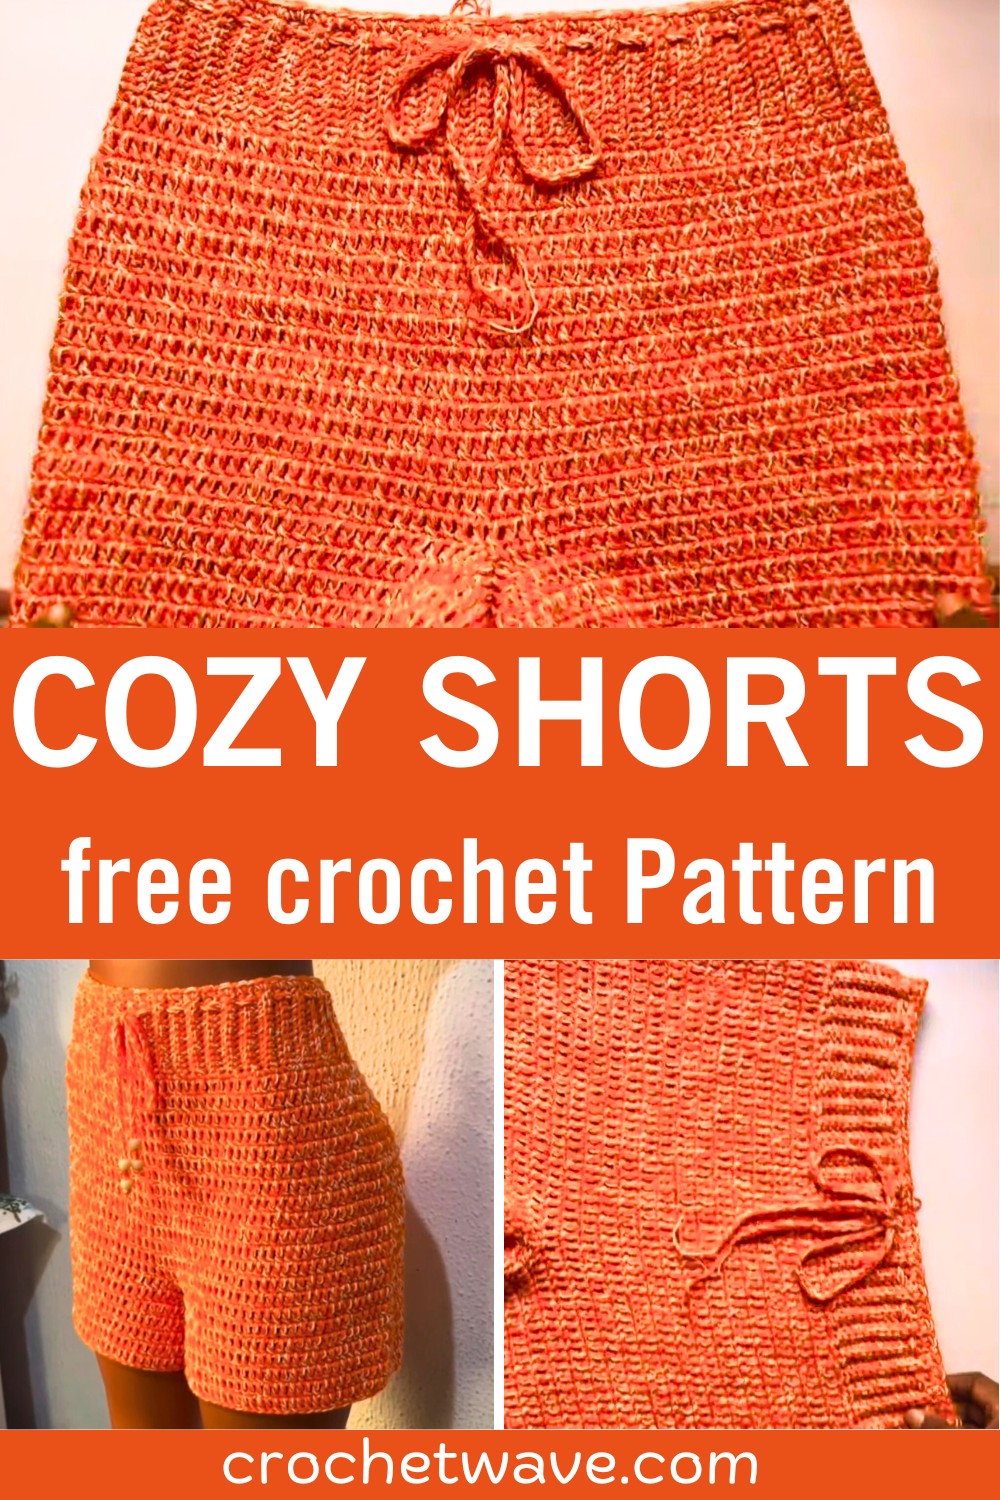
Adding a handmade touch to your wardrobe has never been easier with these crochet shorts. This versatile pattern stands out with its unique texture and structure, presenting a beautiful, customizable garment that is both stylish and functional.
Inspired by the myriad of colorful yarns and the desire for comfortable, chic fashion, this pattern is perfect for expressing your creativity.
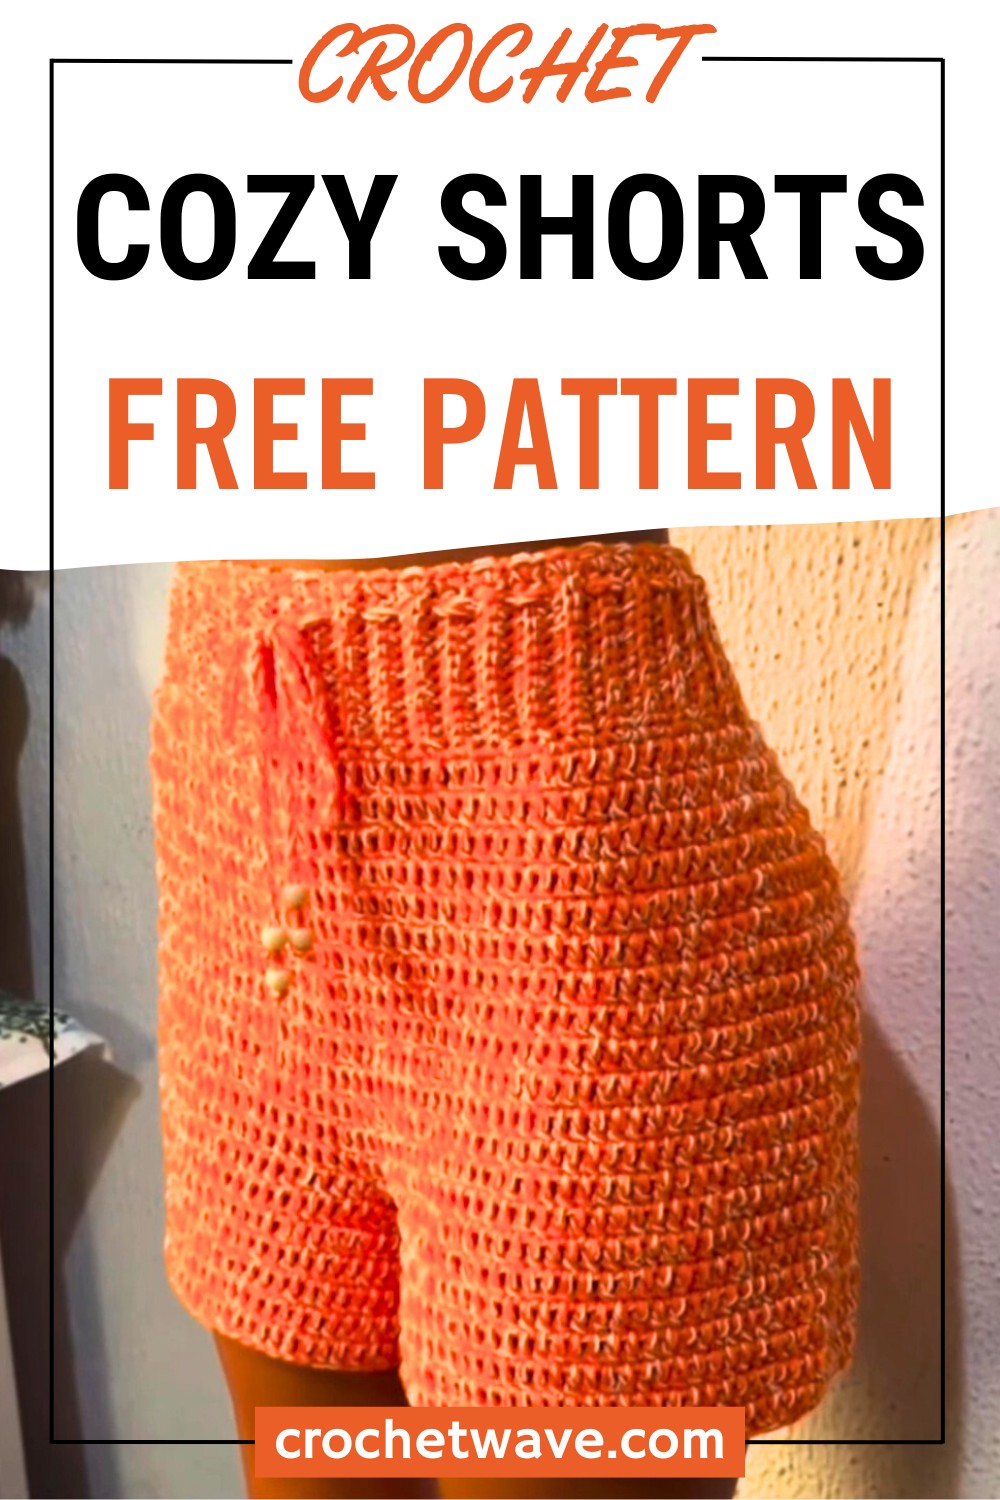
Crochet Shorts Pattern
Crocheting shorts combines fun and practicality, making it an ideal project for both beginners and experienced crafters. These shorts can be adapted for various occasions, from casual summer outings to cozy loungewear.
The joy of creating a wearable piece of clothing from scratch is incredibly rewarding, and this tutorial will guide you to that sense of achievement.
Step By Step Pattern
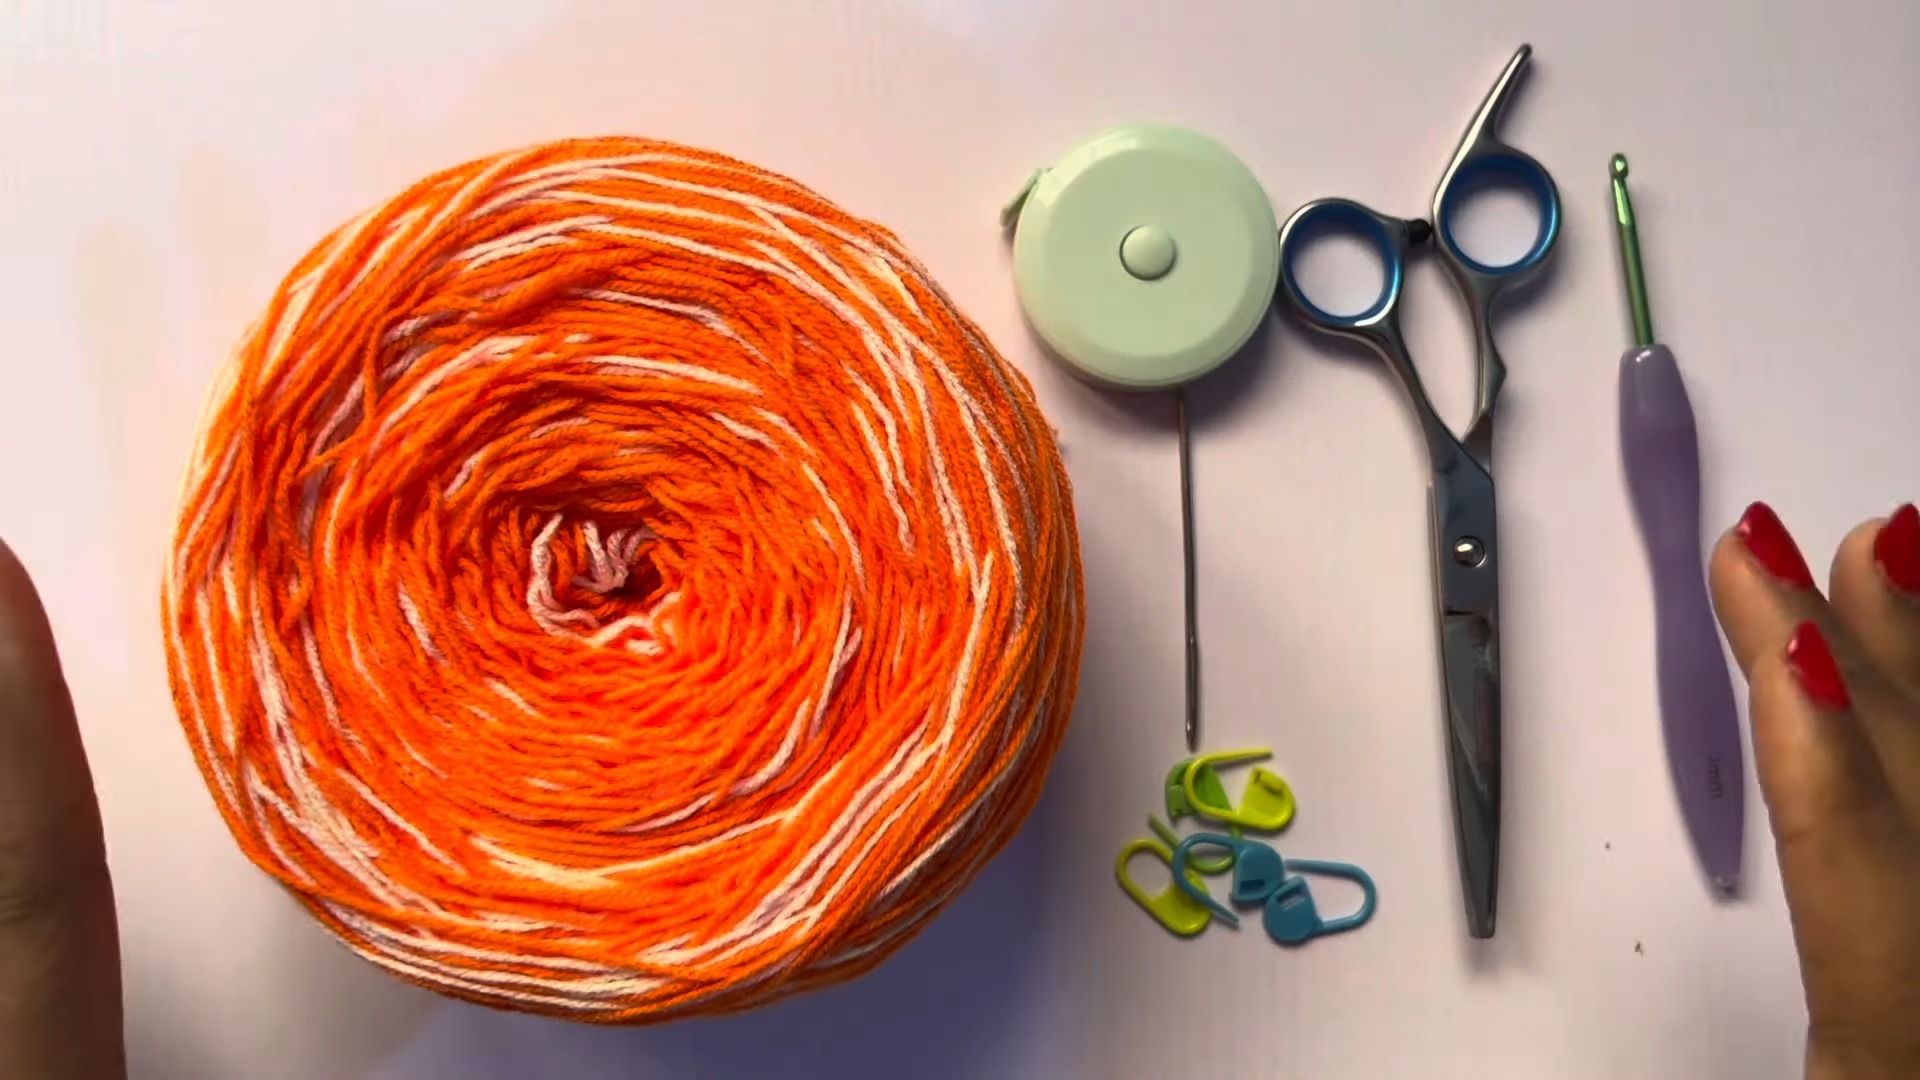
Materials Needed:
- Yarn: Choose your preferred yarn color. For this pattern, a cake yarn made from combining three strands for added fullness is recommended.
- Measurement tape
- Tapestry needle for weaving in ends
- Stitch markers
- Scissors
- Crochet Hook: 4 mm (size G)
Key Crochet Techniques:
- Chain Stitch (ch)
- Single Crochet (sc)
- Double Crochet (dc)
- Slip Stitch (sl st)
- Working in back loops only (blo)

Detailed Instructions
1. Preparing Materials:
- Gather all your materials before starting. Ensure to measure your hips, the desired length of the shorts, and the circumference of your thighs.
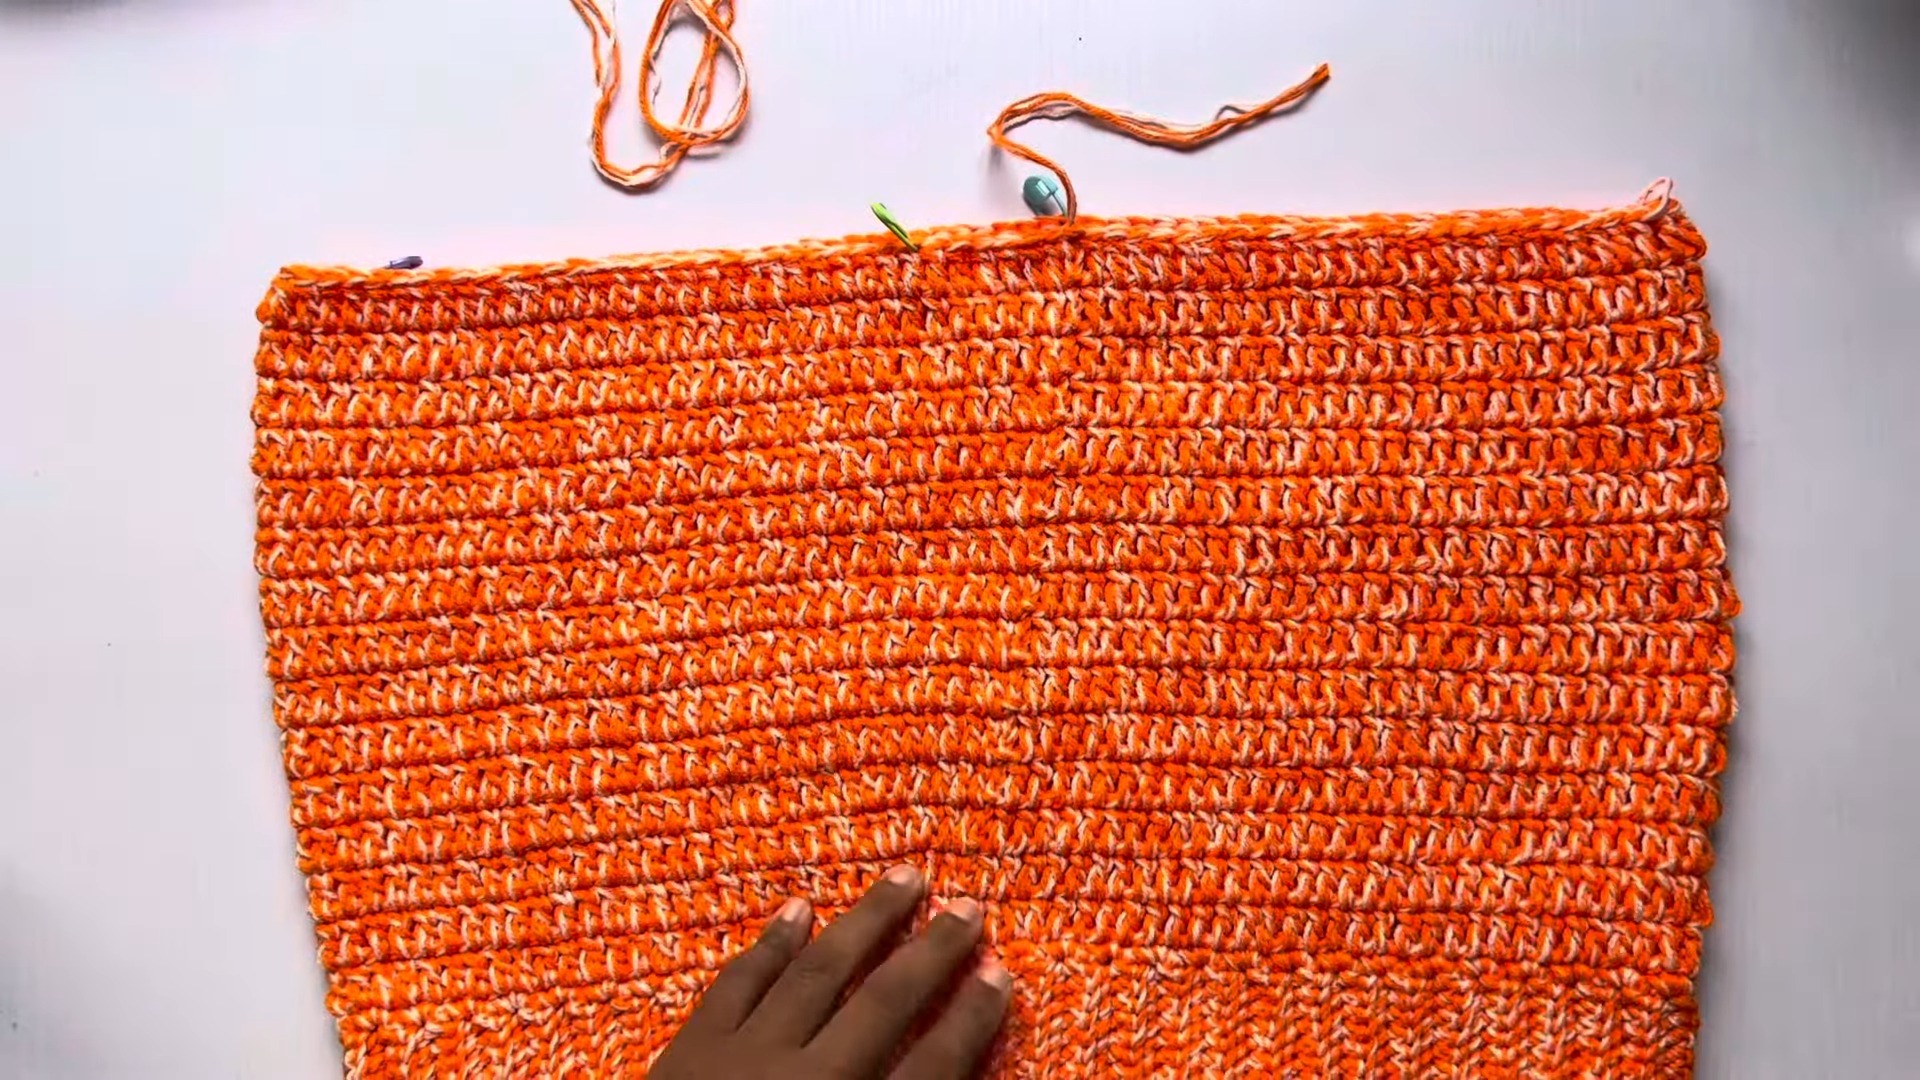
2. Creating the Waistband:
- Chain 12 and work horizontally.
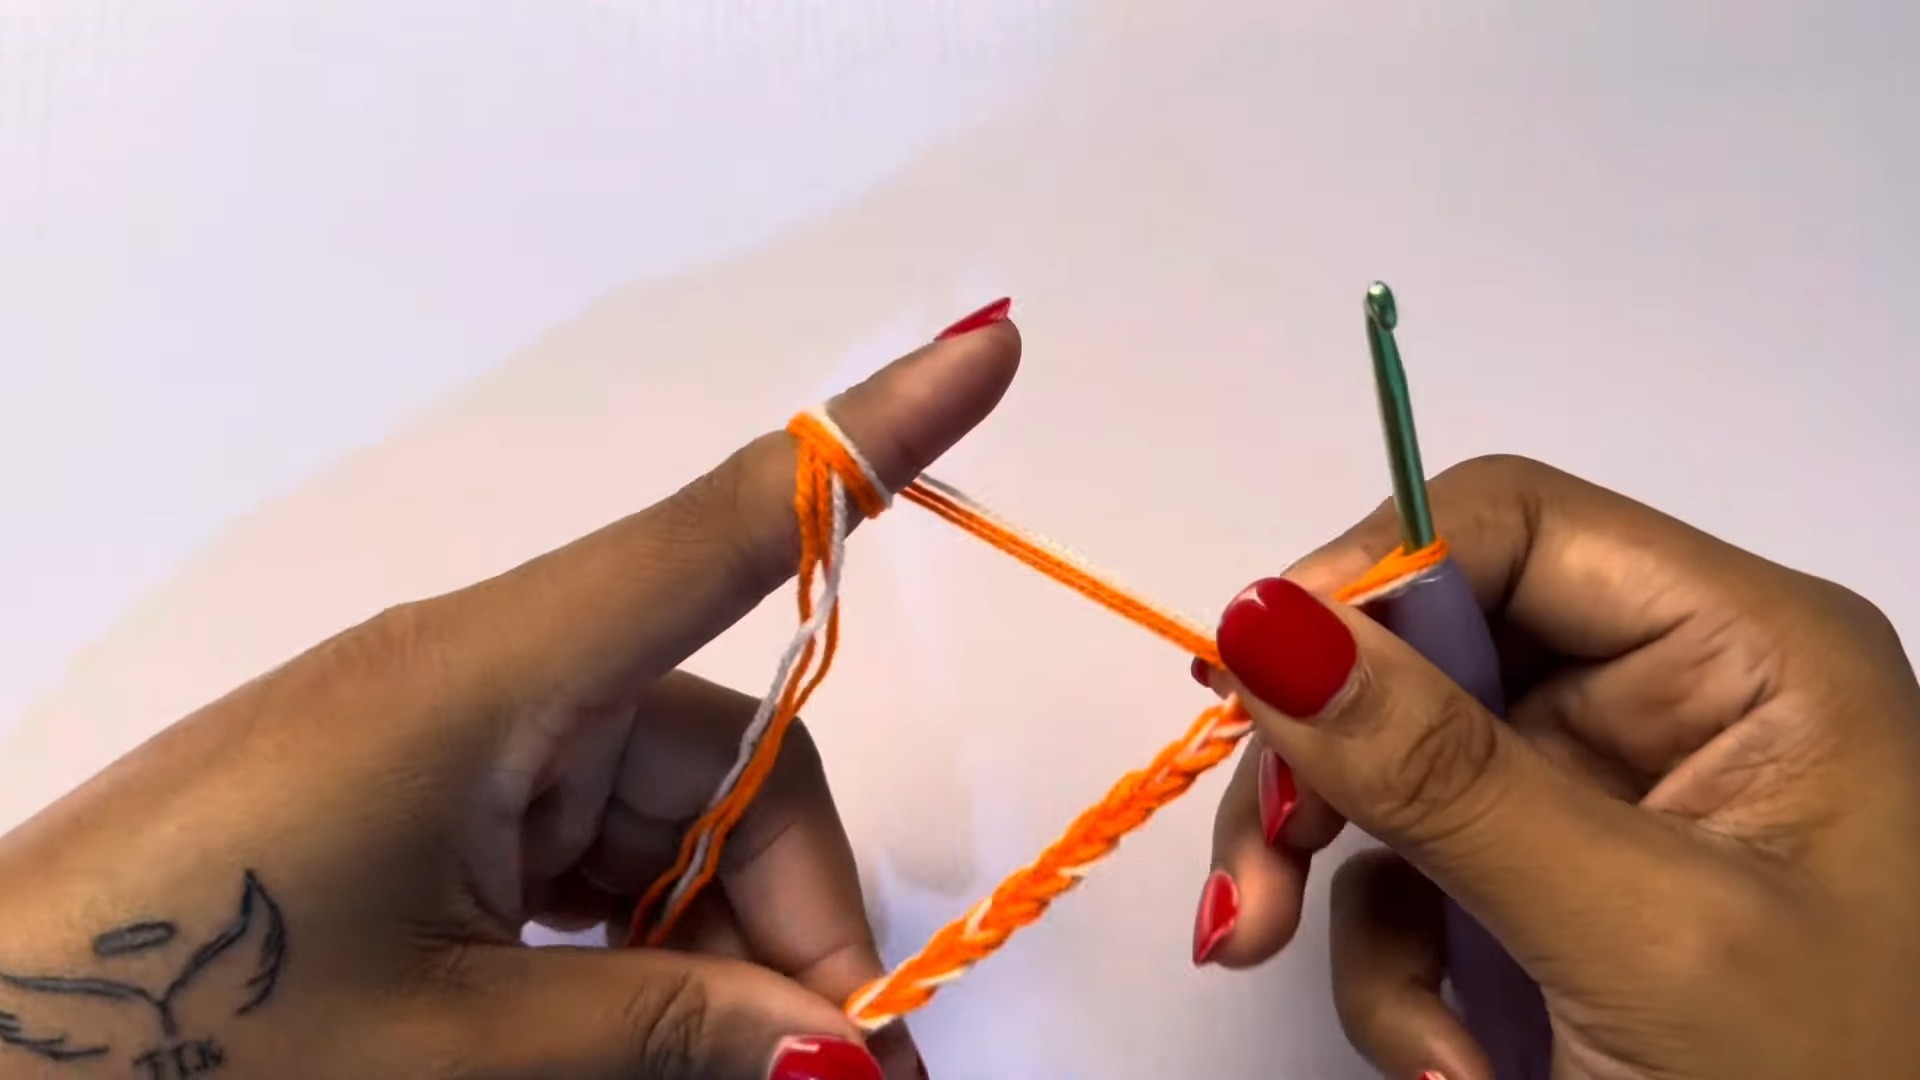
- Chain 1 and single crochet in the next stitch.
- Complete the first row of single crochets, then chain 1, turn your work, and single crochet in the back loop only to create an elastic feel.
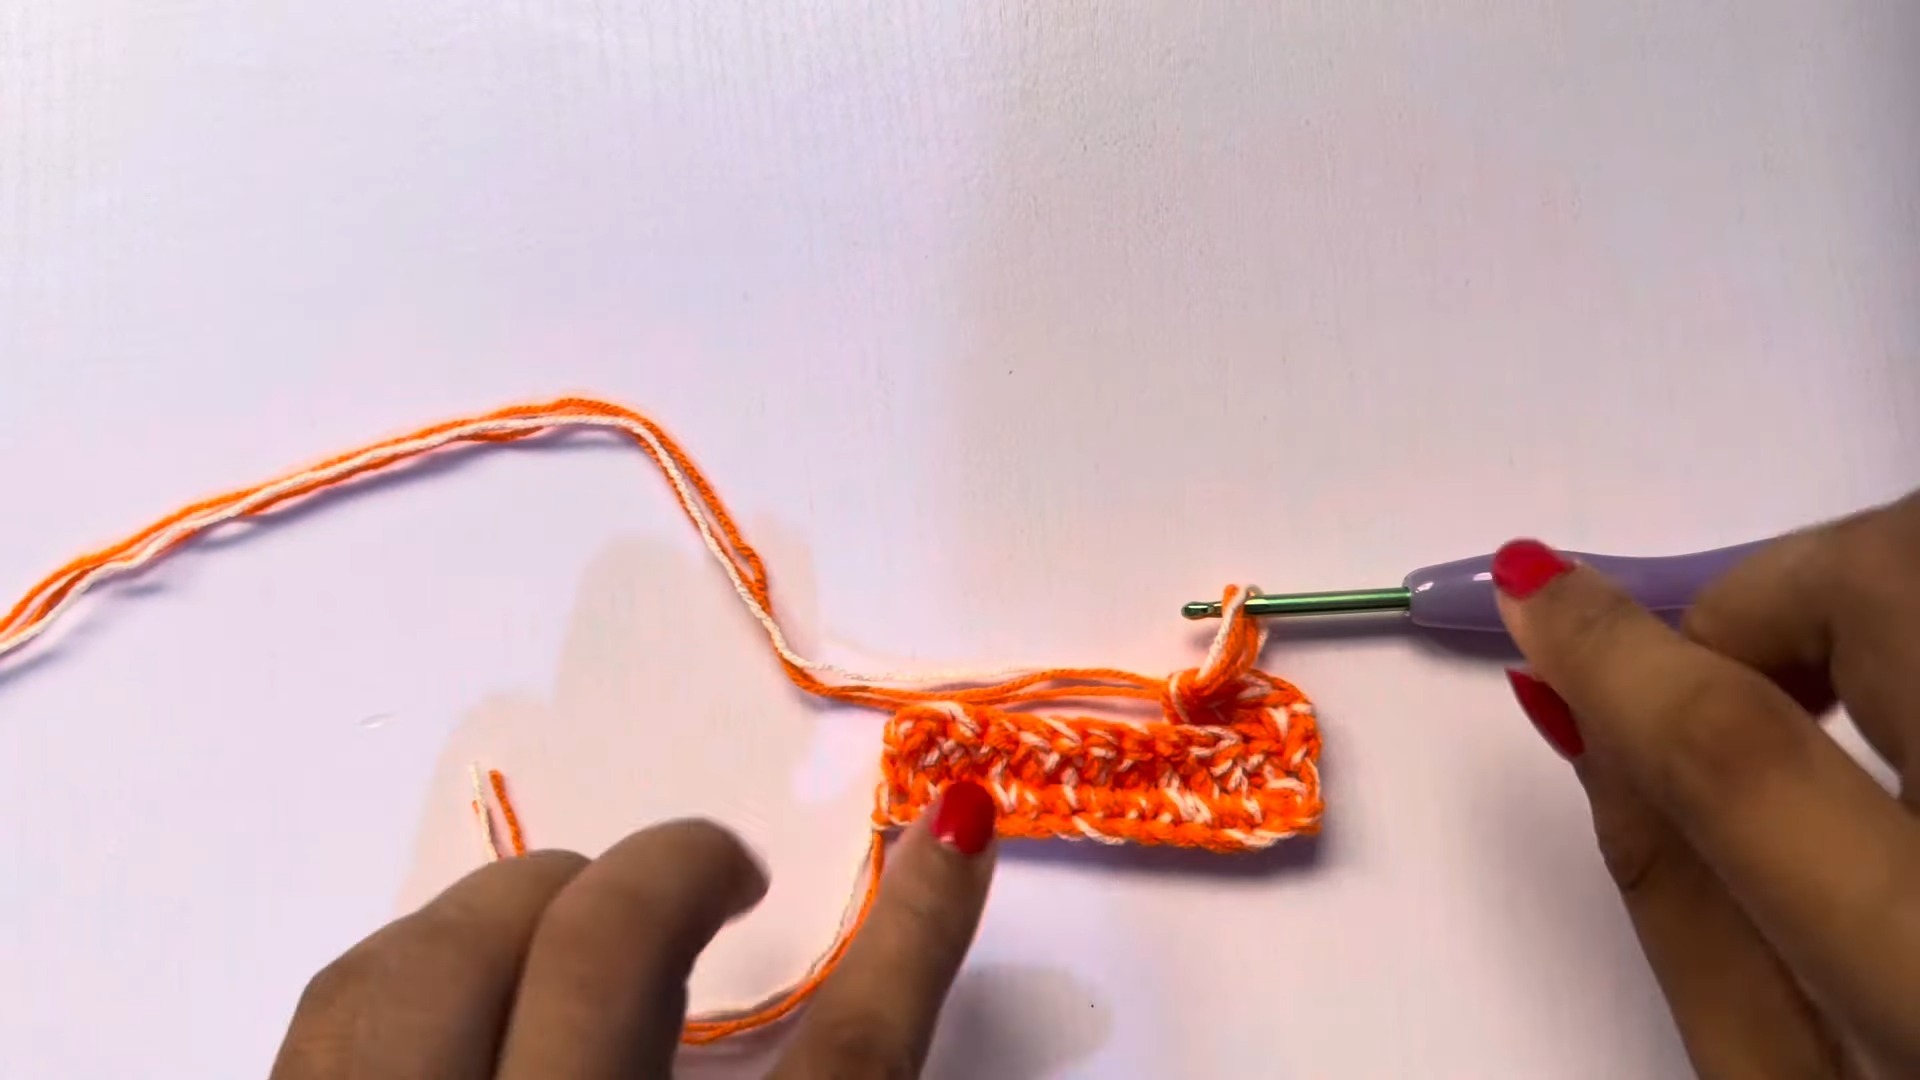
- Repeat this process until the waistband reaches your desired size (e.g., 120 rows for a 44-inch waistband).
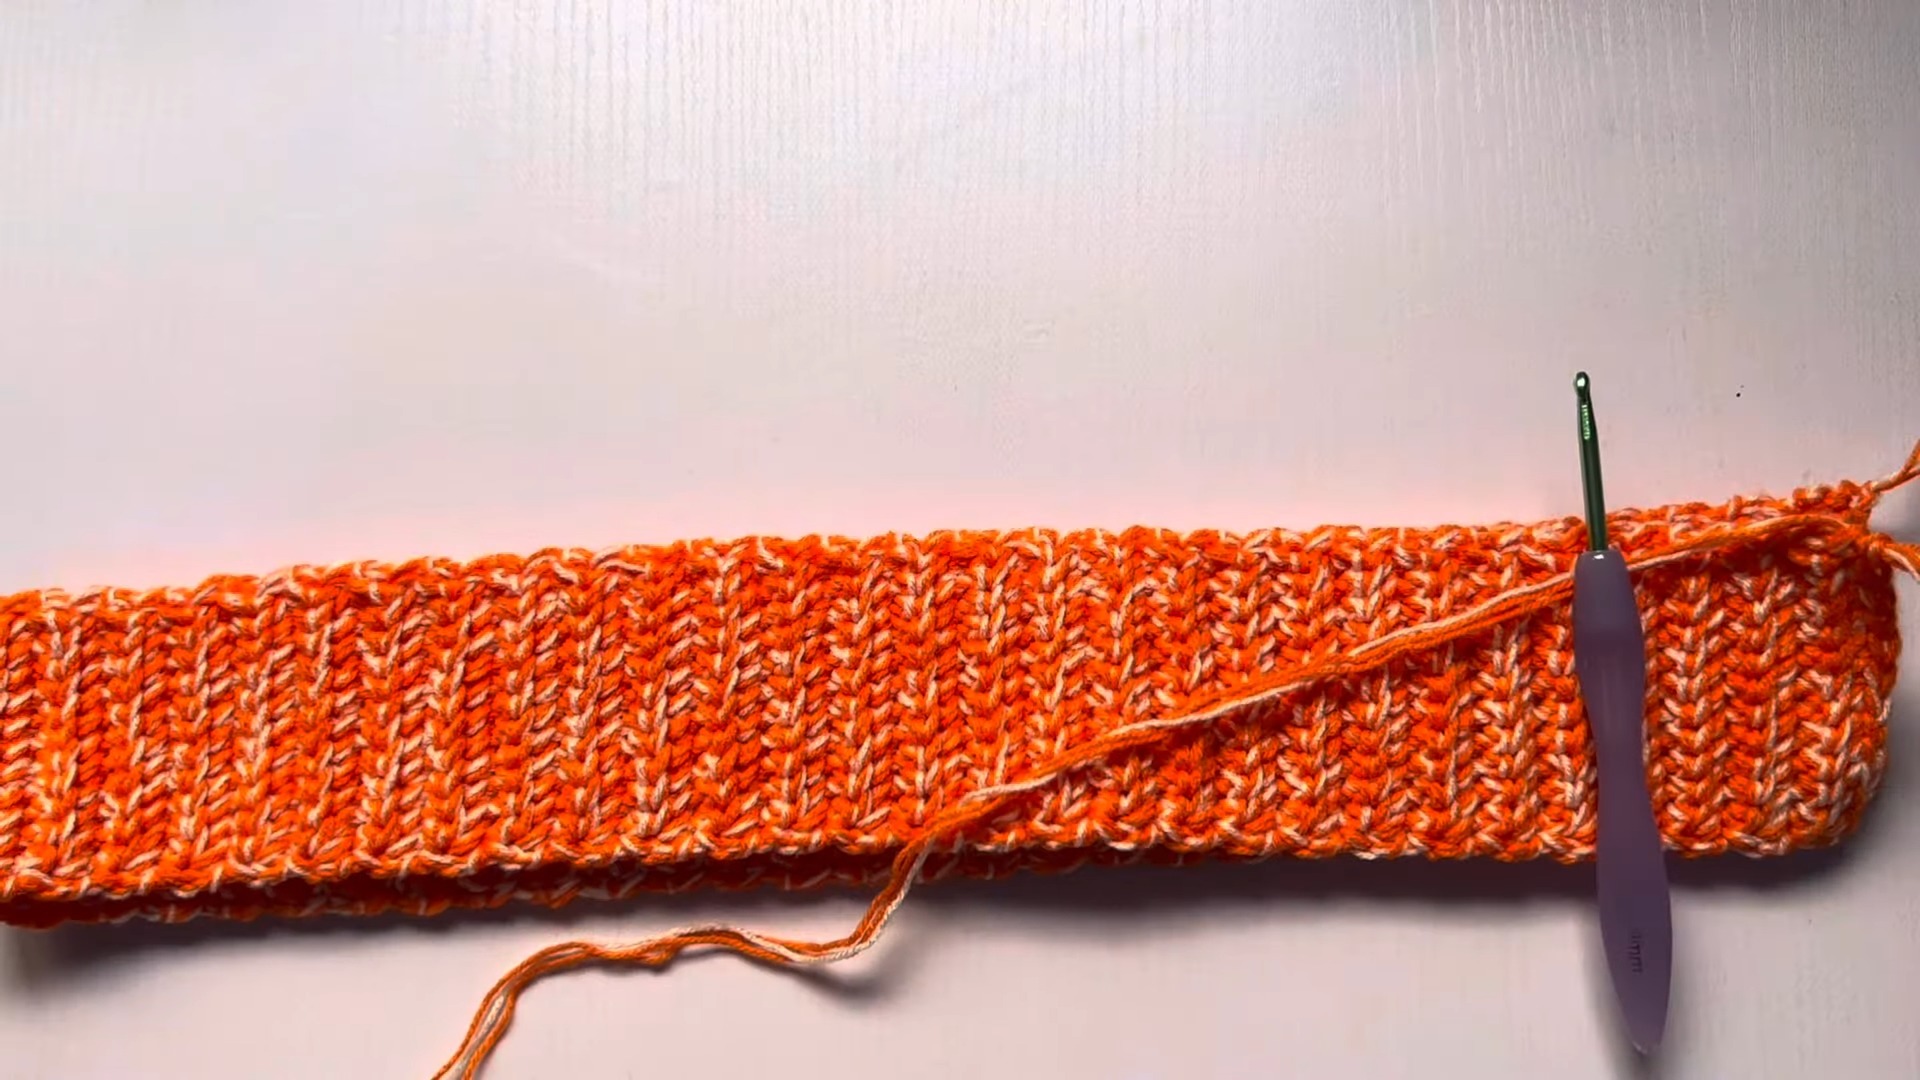
3. Joining the Waistband:
- Join the ends together using a slip stitch, working through the front loops only to maintain elasticity.

- Turn your work to the right side for the next steps.
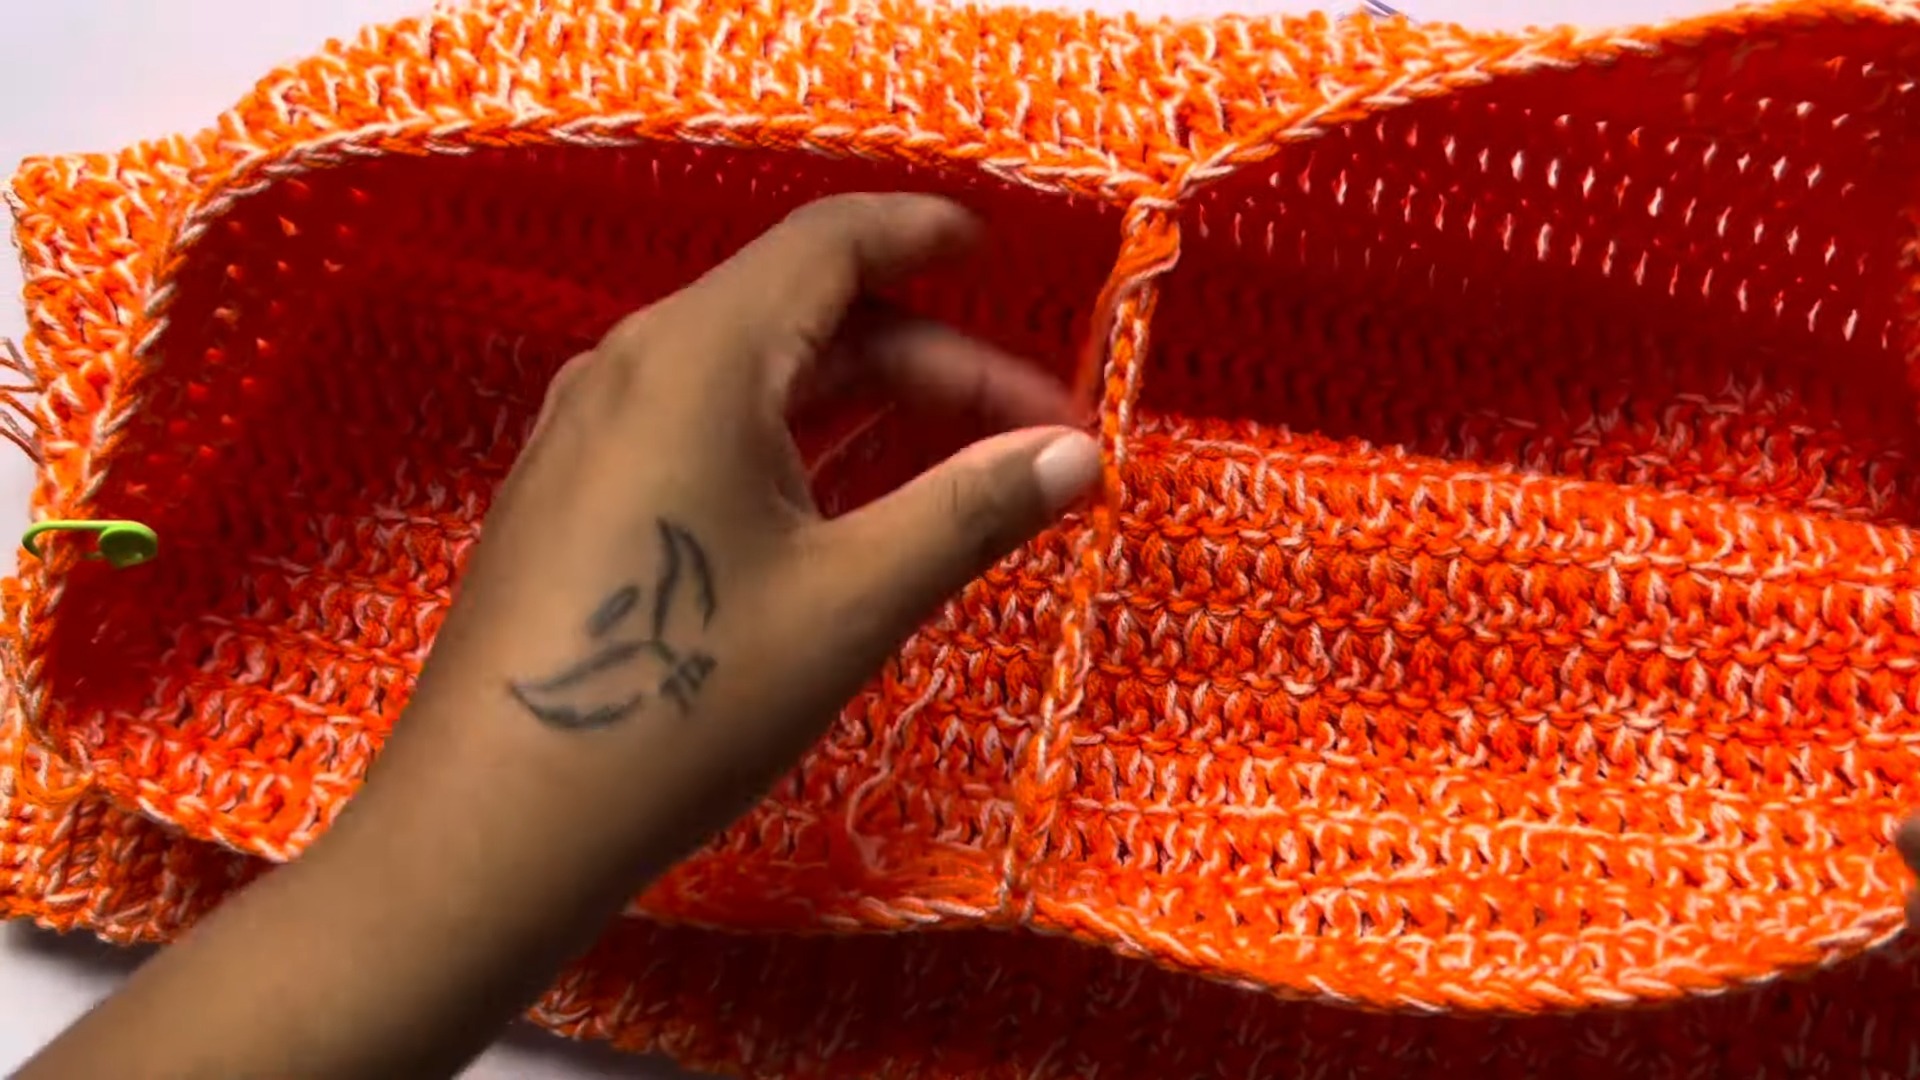
4. Building the Shorts:
- Begin working single crochets around the waistband, ensuring the stitch count matches the number of rows (e.g., 120 stitches for 120 rows).
- Transition to double crochets for the body, working in rounds.
- Increase evenly on the sides to shape the garment, following this pattern:
- 1st increase row: Two double crochets at the stitch markers.
- 2nd increase row: Two double crochets over two adjacent stitches.
- 3rd increase row: Two double crochets on the sixth stitch, and another two on the next sixth stitch.
- Continue crocheting until reaching your desired length (e.g., 15 rows).
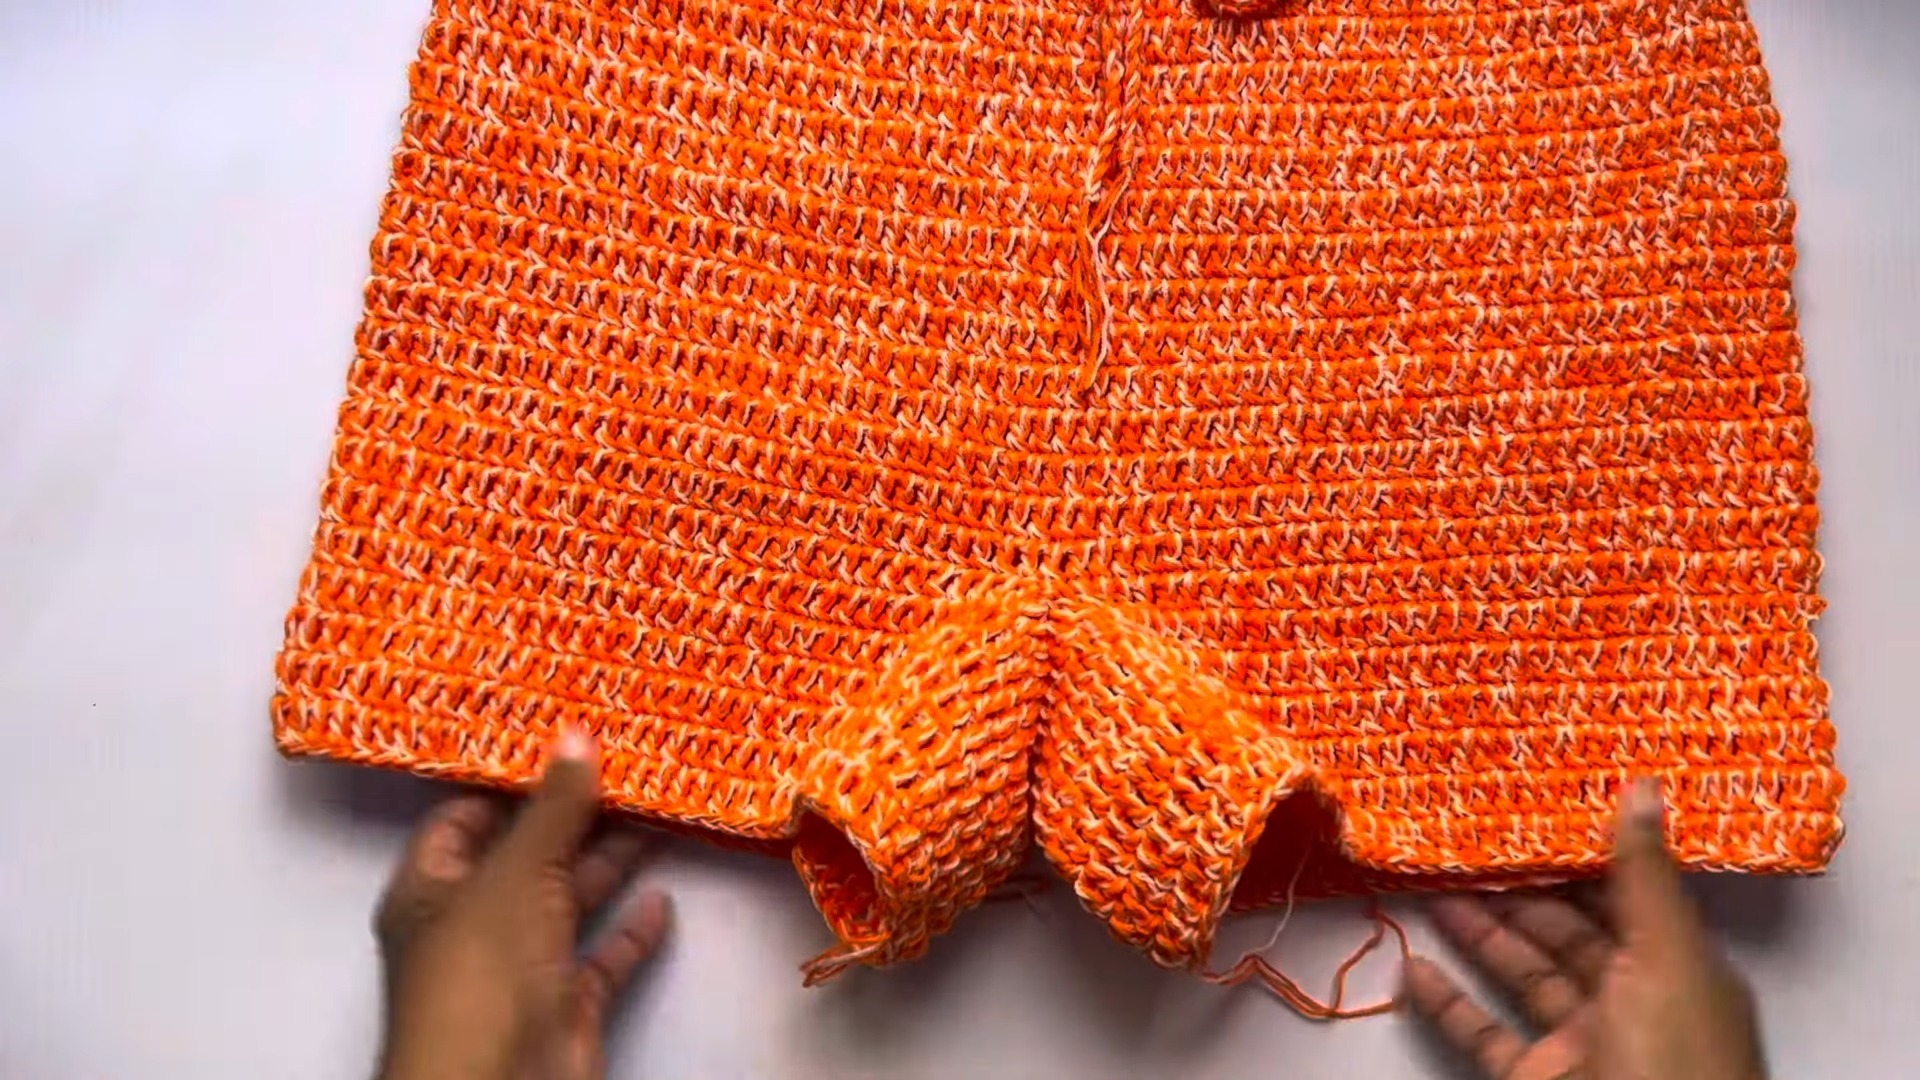
5. Forming the Leg Openings:
- From the center, create the crotch by chaining 20 (adjust for your size).

- Slip stitch to the opposite side to form the leg hole.
- Crochet around the leg opening, working double crochets. Maintain consistent stitch count between rounds to shape the leg area.
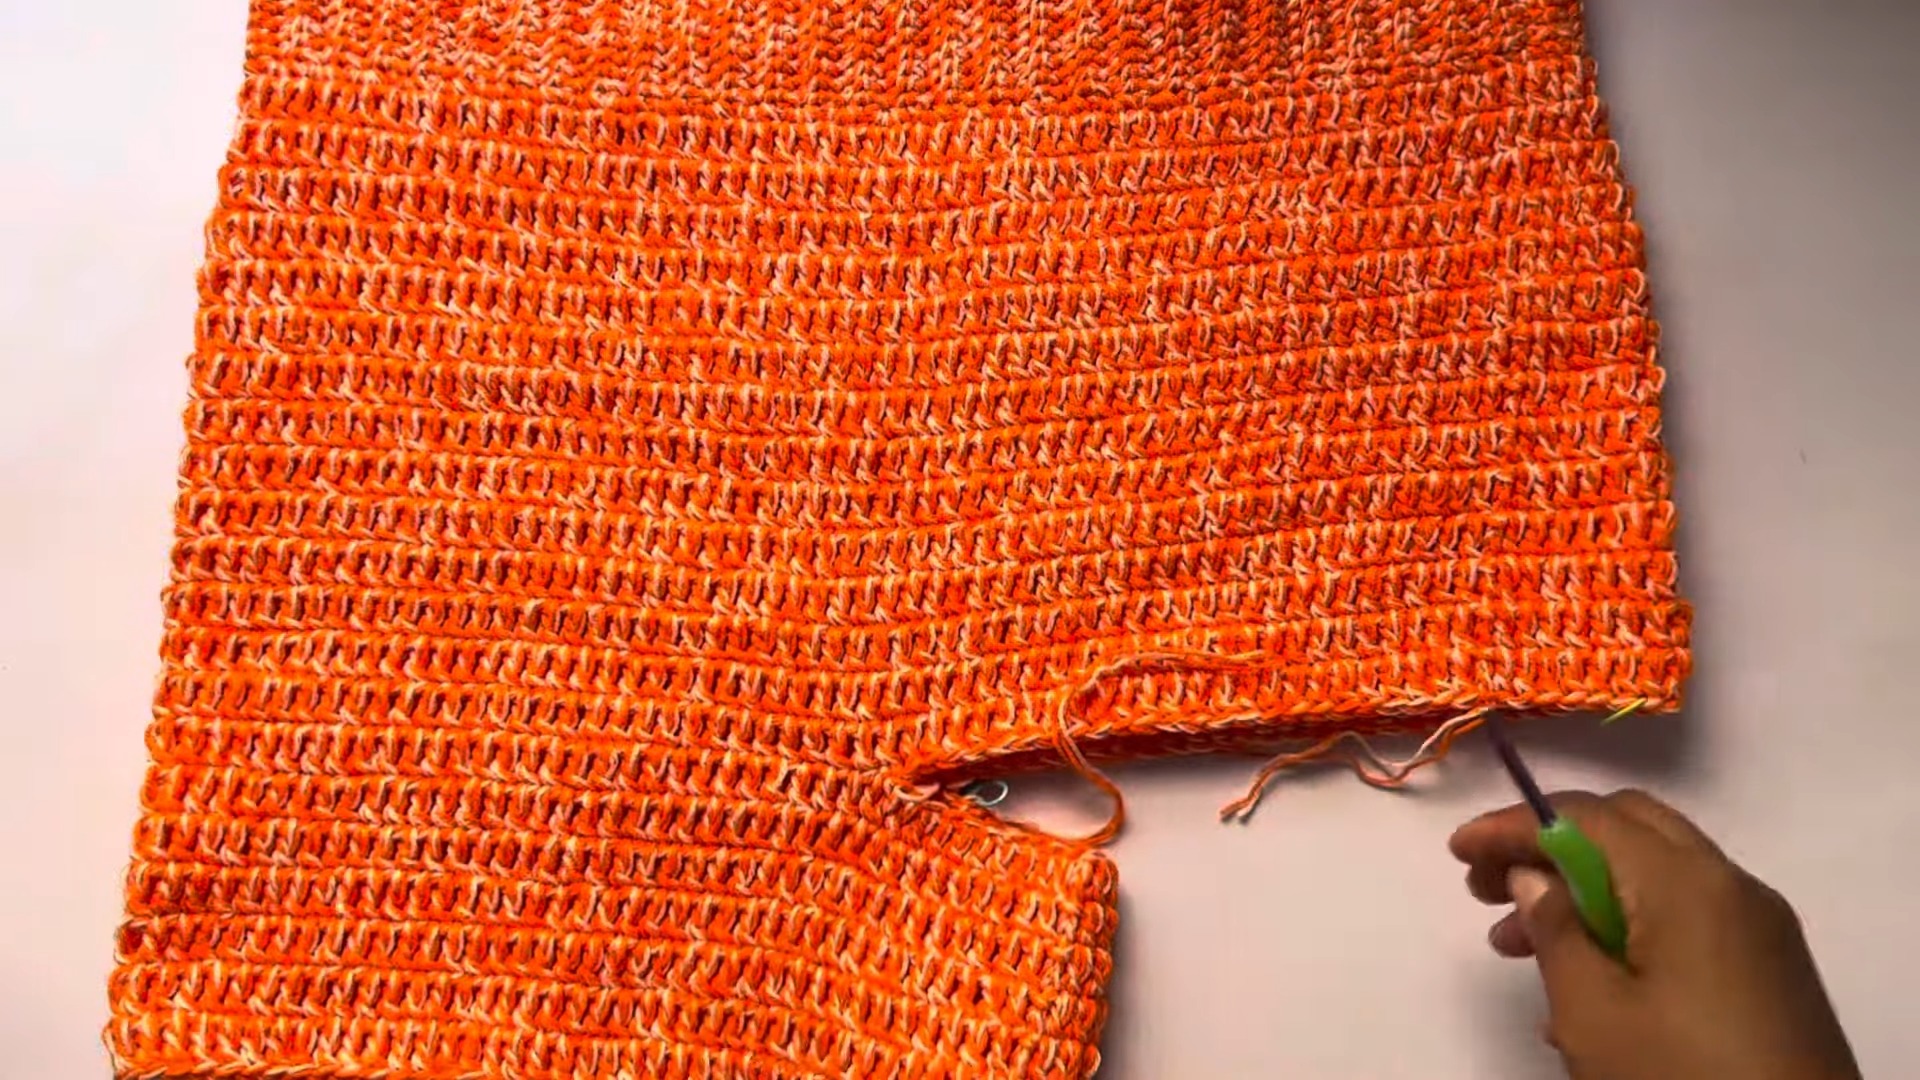
6. Finishing:
- Repeat for the second leg.
- Optionally, add a drawstring by chaining 250 (or another length suitable for your waistband) and weaving through the top.
- Consider adding a single crochet around the waistband for a firm finish.
Size Adjustments
To customize these shorts for different sizes:
- Adjust the initial chain length for the waistband based on hip measurements.
- Modify the increase rows to accommodate larger or smaller sizes.
- Alter the bridge chain count for the crotch to ensure a comfortable fit.
- Consistently measure as you work, tailoring the shorts to your measurements.
FAQ
Q: How do I ensure the waistband is the right size?
A: Measure your hips accurately and ensure your initial rows match the hip measurement.
Q: My shorts seem too tight. What can I do?
A: Add extra rows or stitches in the increase rows to allow more space.
Q: How do I keep the shorts from being stiff?
A: Use soft yarn and avoid tight stitches for a comfortable, flexible fit.
Conclusion
We hope you enjoy making these crochet shorts, a charming addition to any wardrobe. The versatility and adaptability of this pattern allow for endless customization. We encourage you to share your finished projects and any variations you’ve made. Thank you for following along, and happy crocheting!