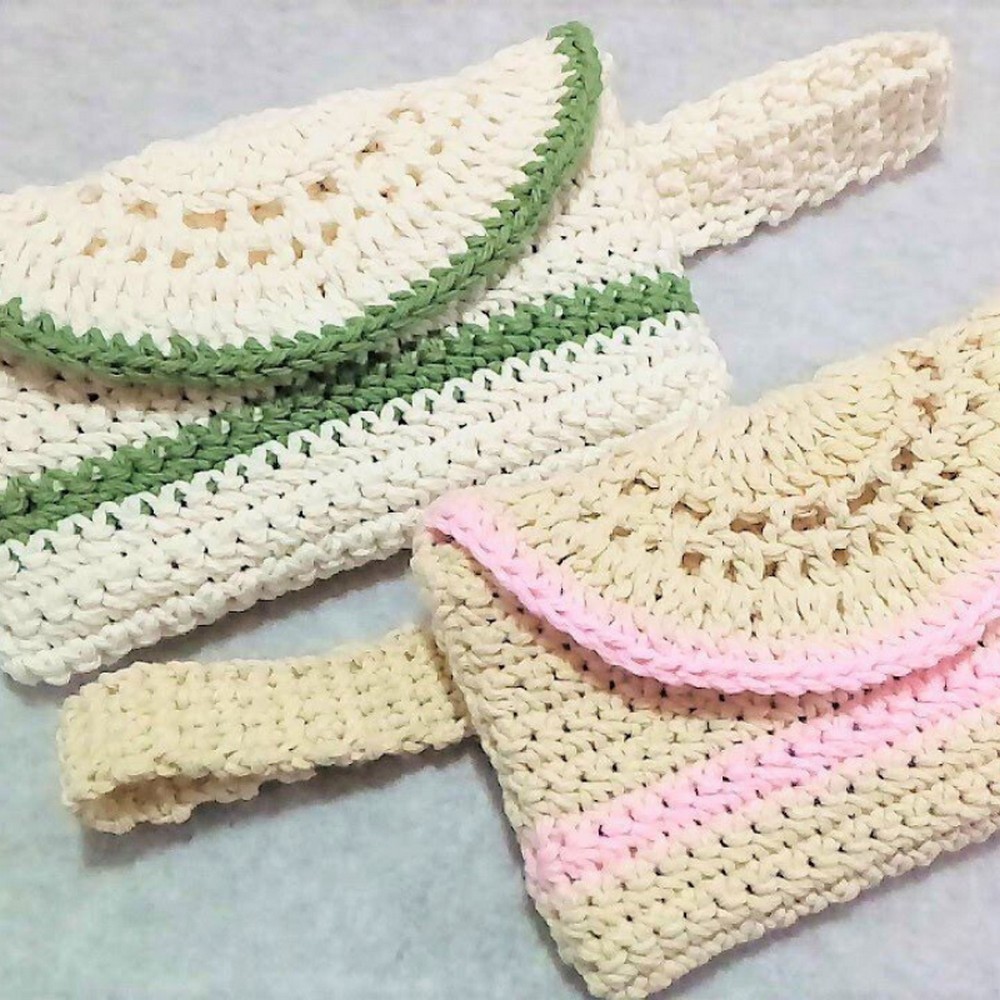
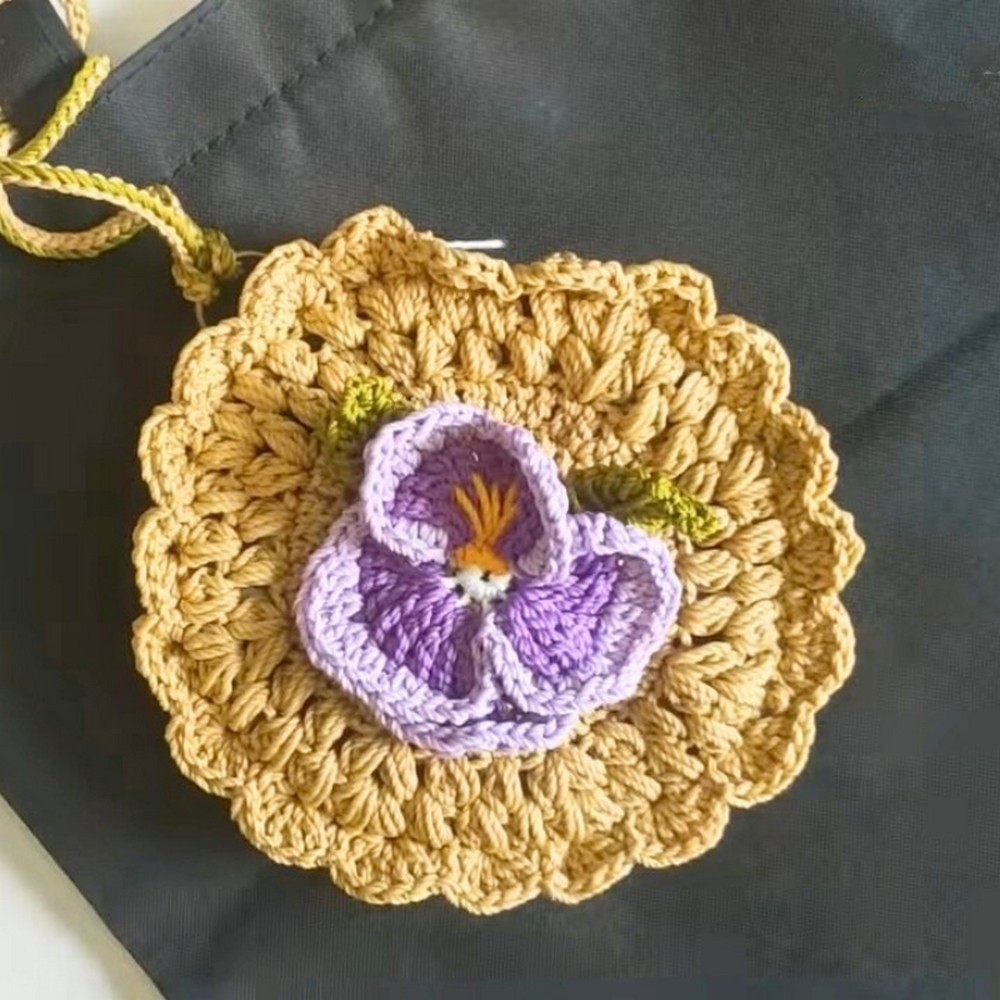
Crochet Round Wallet with Floral Motif – Easy Crochet Guide
Welcome to our detailed guide on creating a beautiful and unique Crochet Round Wallet with Floral Motif. This crochet piece stands out with its intricate floral details and versatile design. It’s perfect for adding a touch of creativity and personal flair to any wardrobe or home decor. Inspired by the elegance of orchid flowers, this wallet pattern is sure to impress and charm everyone who sees it.
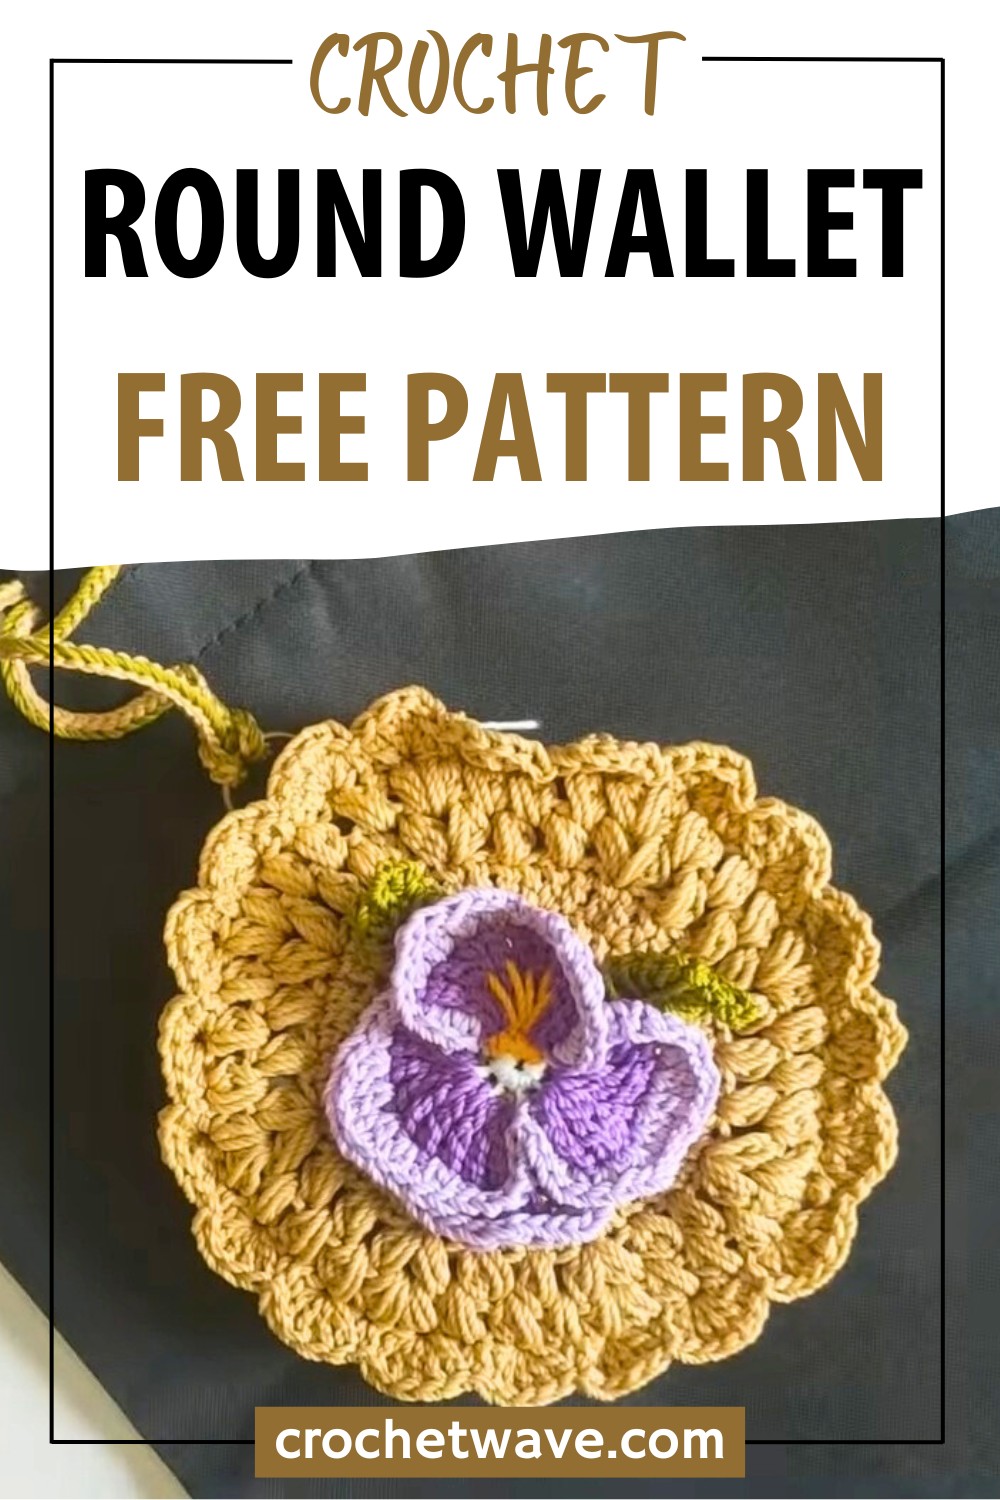
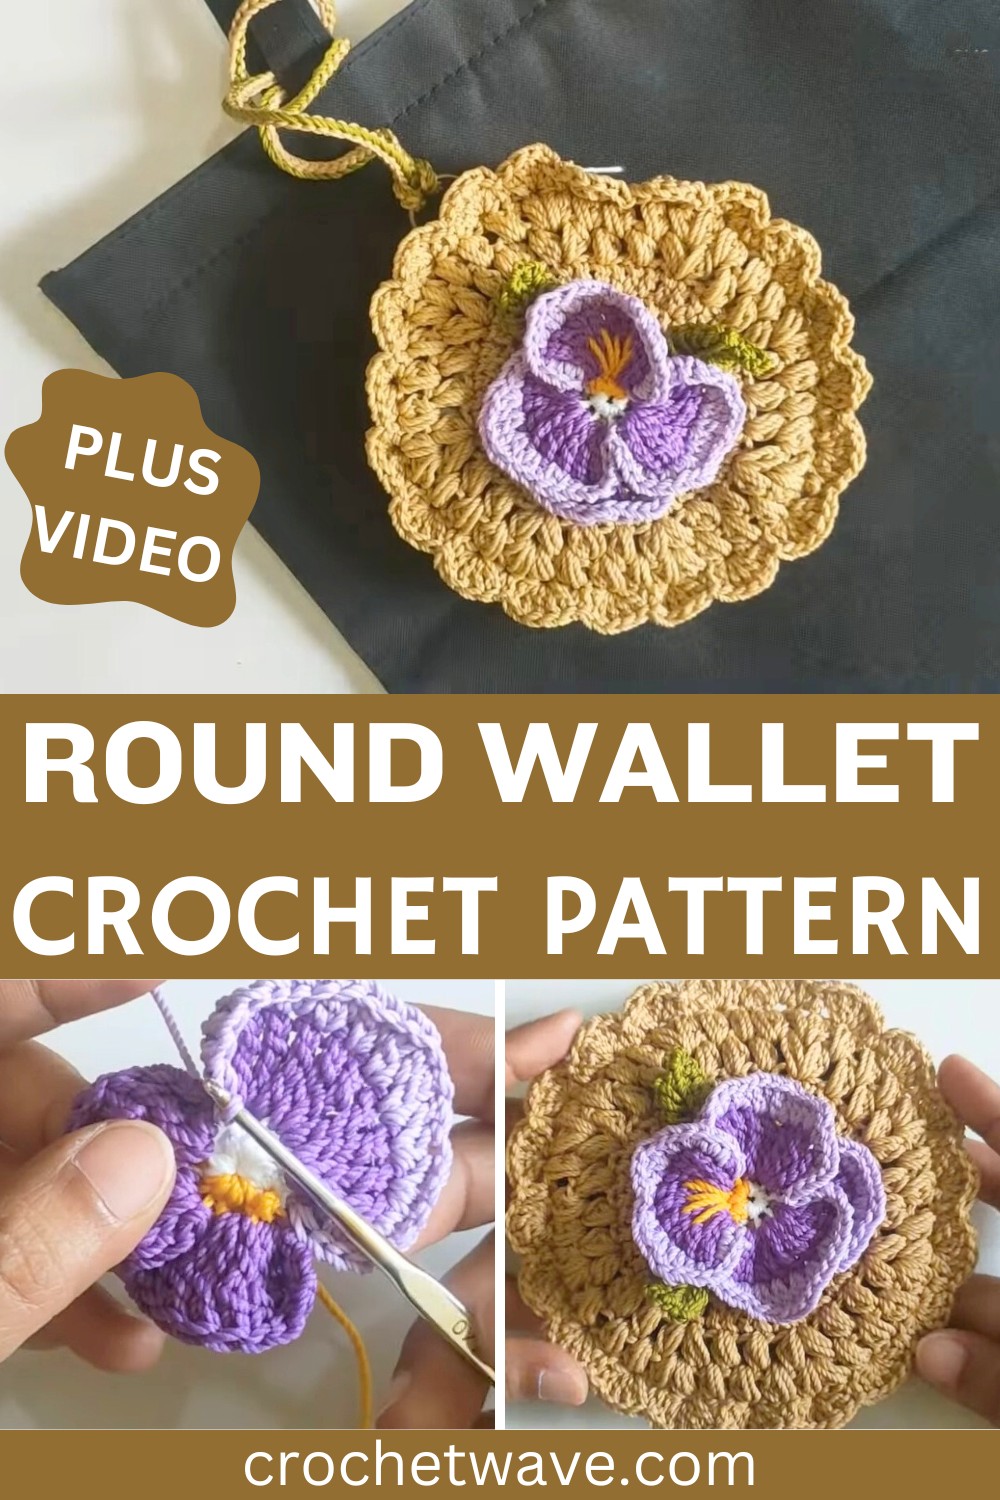
This Crochet Round Wallet with Floral Motif boasts exquisite floral decorations that make it a standout accessory in the crochet world. The beautiful mix of colors and textures transforms a simple wallet into a fashionable and functional piece of art. Inspired by the delicate beauty of orchids, this design can add a touch of nature’s elegance to your everyday items, making it a perfect accessory for any occasion.
Whether you’re a beginner eager to learn new crochet techniques or an experienced crocheter searching for a fresh challenge, this pattern offers something for everyone. Its versatility allows it to be used as a chic wallet, a small pouch, or even a decorative piece. Imagine the joy and sense of accomplishment you’ll feel once you’ve completed this stunning project and can proudly showcase your handmade work.
Materials and Techniques
To create this beautiful crochet piece, you will need the following materials:
- Yarn: Onitsuga Polycherry Thread
- Crochet Hook: 4/0 hook from Tulip
- Additional Tools: Scissors, tapestry needle, and a lighter for finishing ends
- Optional: D ring (1 cm) for adding a strap or handle
Key Crochet Techniques:
- Magic Ring
- Single Crochet (SC)
- Triple Crochet (TC)
- Half Double Crochet (HDC)
- Double Crochet (DC)
- Slip Stitch (SS)
- Puff Stitch
Step-by-Step Instructions
Floral Motif
- Create a Magic Ring using the white thread. Chain 1 and make 6 SC in the ring.
- Replace white with yellow and make 3 SC. Pull white threads and slip stitch to form a circle.
- Break the white thread, leaving a bit of the yellow.
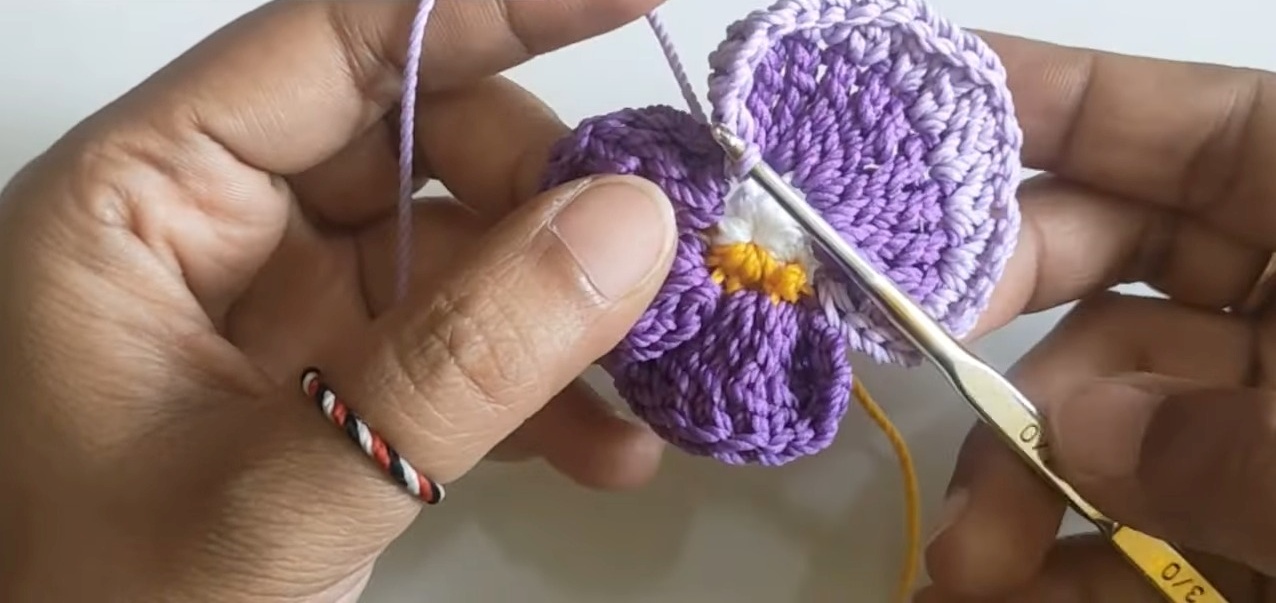
- First Row of Petals: Attach dark purple, create three chains at the start, and work on the front loops only. Make 9 TC in total, followed by 3 chains and a slip stitch to form each petal. Repeat for three petals.
- Second Row: Switch to light purple. Make a slip knot, attach it to the start, and follow a sequence of SC and various increases (HDC, DC) to form the next layer of petals.
Separate Flower Petals
- Create a Magic Ring, chain 3, and make 9 TC. Follow the same petal pattern as before but with adjustments for the unique petal look.
Leaf Pattern
- Slip Knot and chain 9. Work HDCs using incomplete stitches (Tunisian hook) and finish accordingly for a total of 8 stitches. Form a small leaf shape.
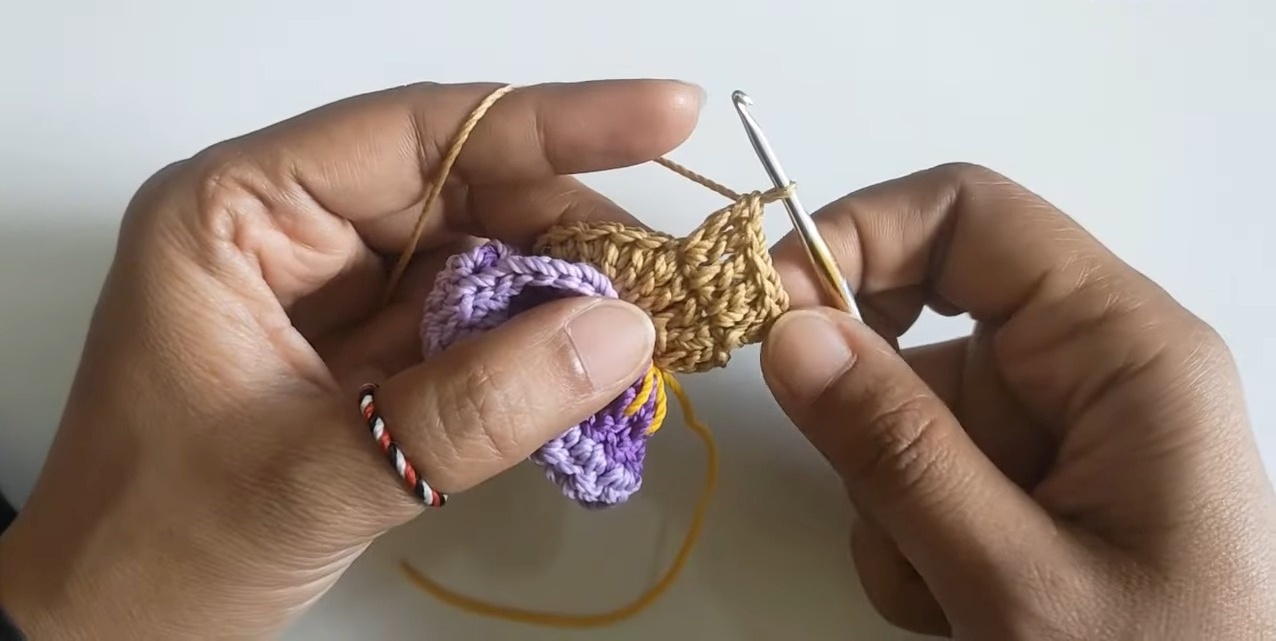
Wallet Base
- Attach thread to the back loop of flower petals. Begin with one chain and work following the pattern with SC increases. Continue forming rows with DC increases to shape the wallet base.
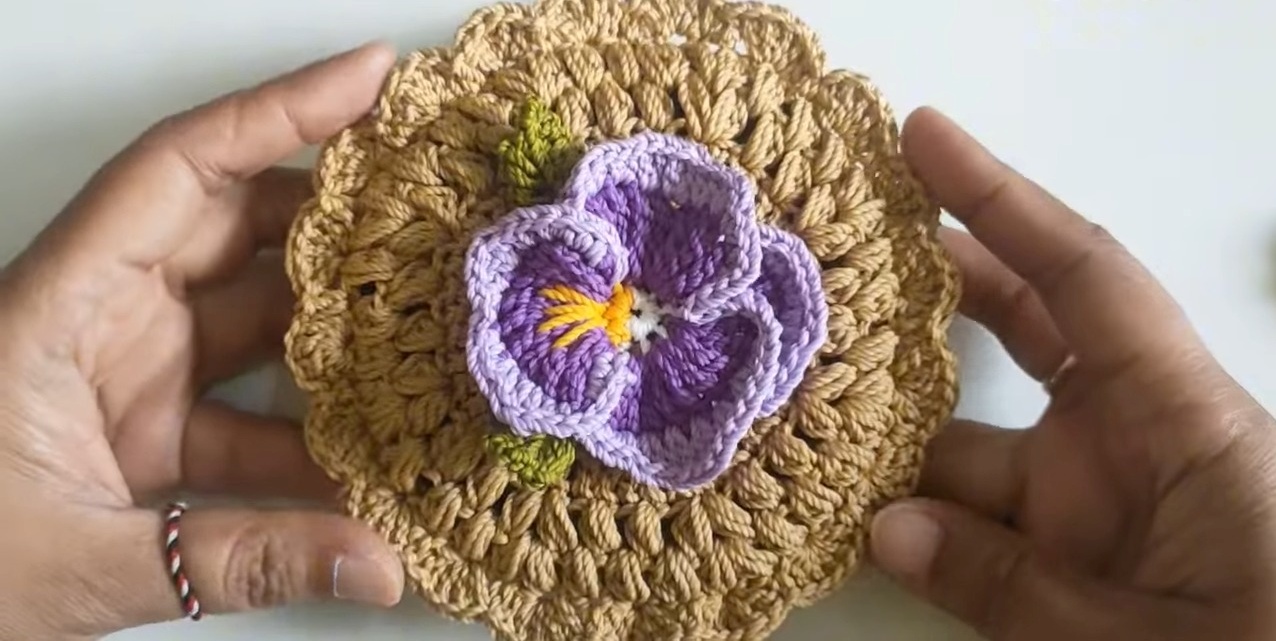
Hem and Assembly
- Create puff stitches around the edge to form a decorative border.
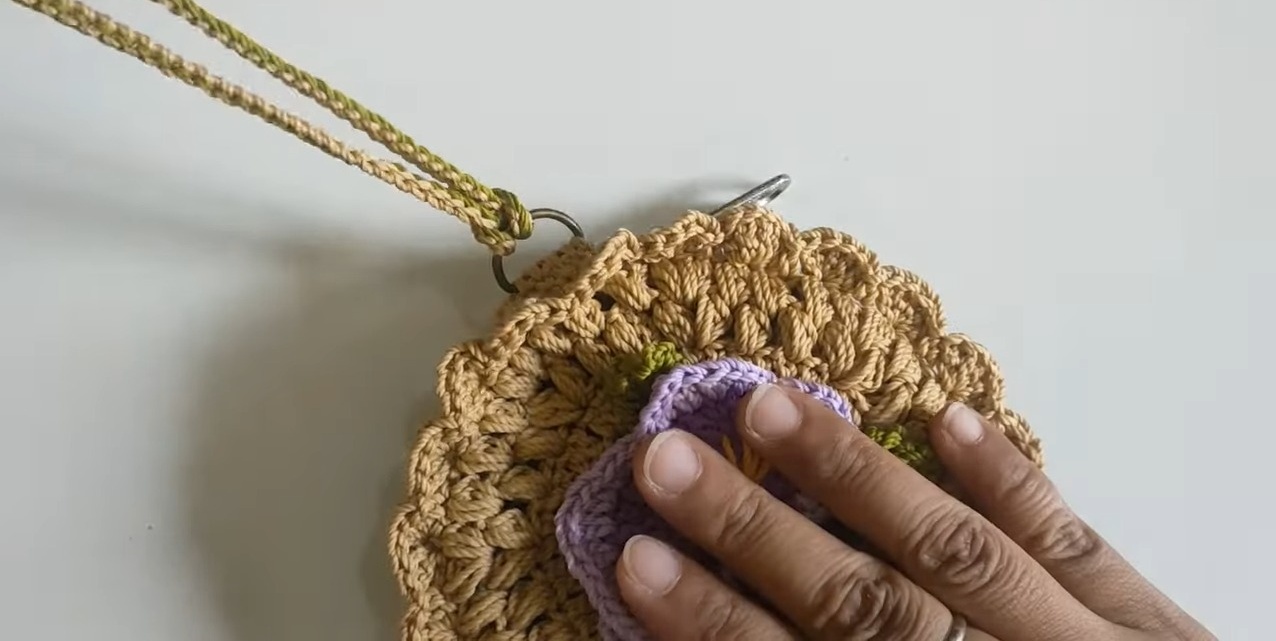
- Complete the wallet by joining two pieces with SC, attaching any additional decorations, and sewing on the zipper using the long thread ends. Optionally, install a D ring for added functionality.
Size Adjustments
To customize the wallet size:
- Increase or decrease the number of initial SC stitches in the Magic Ring.
- Adjust the number of rows and the sequence of increases.
FAQ Section
Q: What type of yarn should I use?
A: Onitsuga Polycherry Thread is recommended for optimal results, but any similar yarn can be used.
Q: How do I make my petals stand out more?
A: Using contrasting colors and ensuring your stitches are tight will make the petals more prominent.
Q: Can I use a different crochet hook size?
A: Yes, but be aware that it will affect the size and tightness of your stitches.
Credit DIY Maycraft
Conclusion
We hope you enjoyed this guide to creating a Crochet Round Wallet with a Floral Motif. This fun and rewarding project highlights unique qualities and the beauty of crocheting intricate designs. We encourage you to share your finished projects and any creative variations you’ve made. Thank you for following along, and happy crocheting!
Video Tutorial: