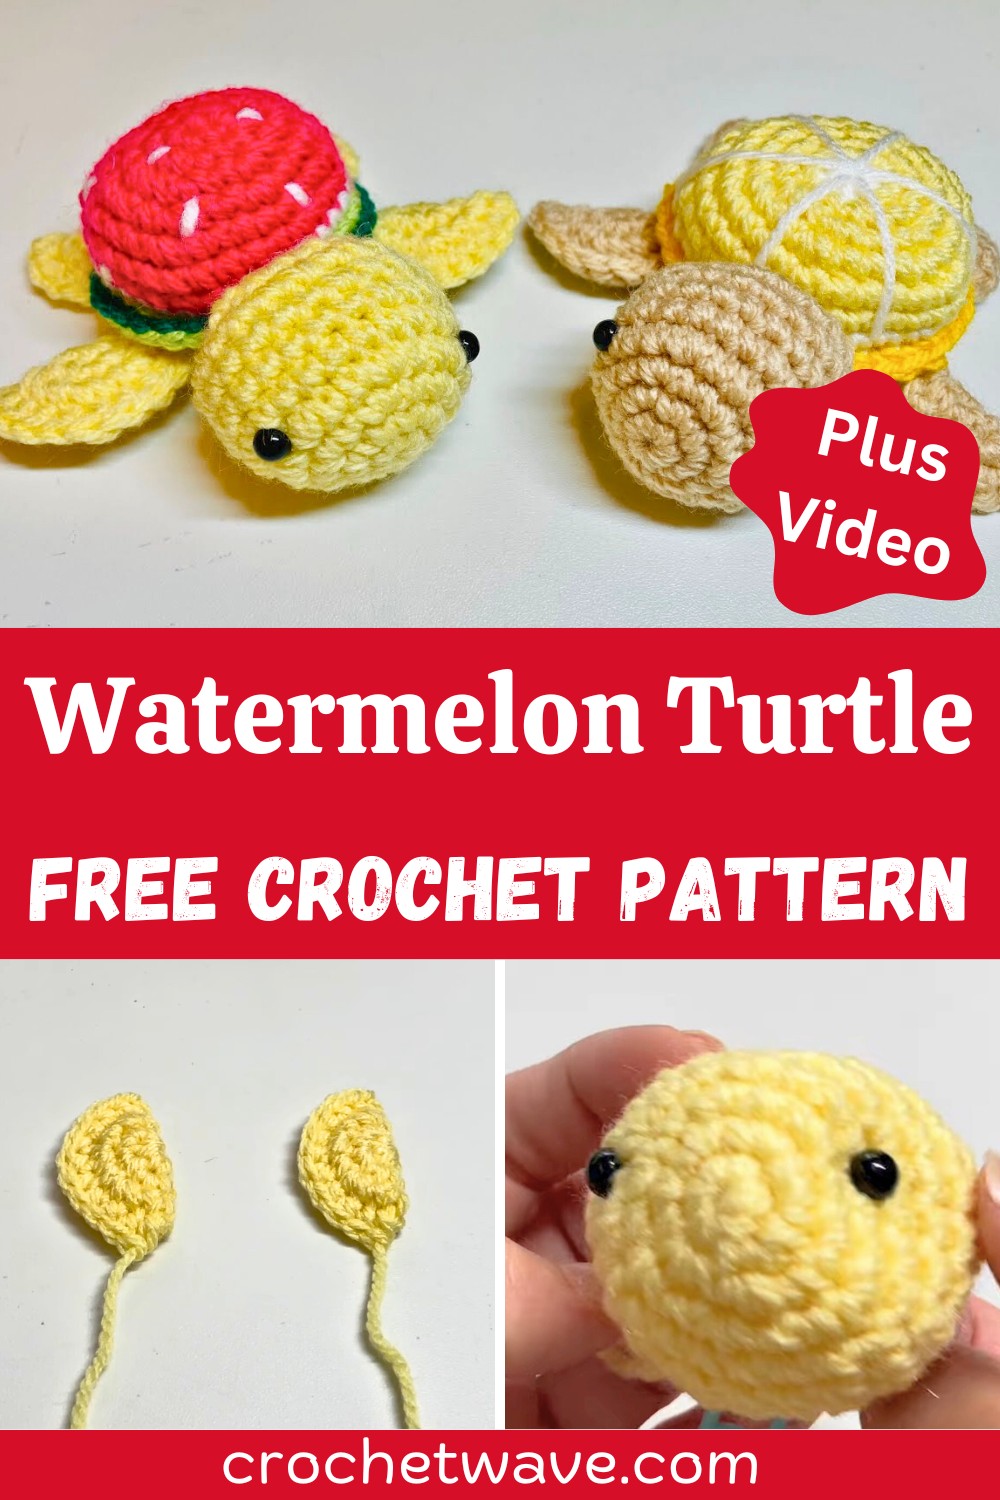
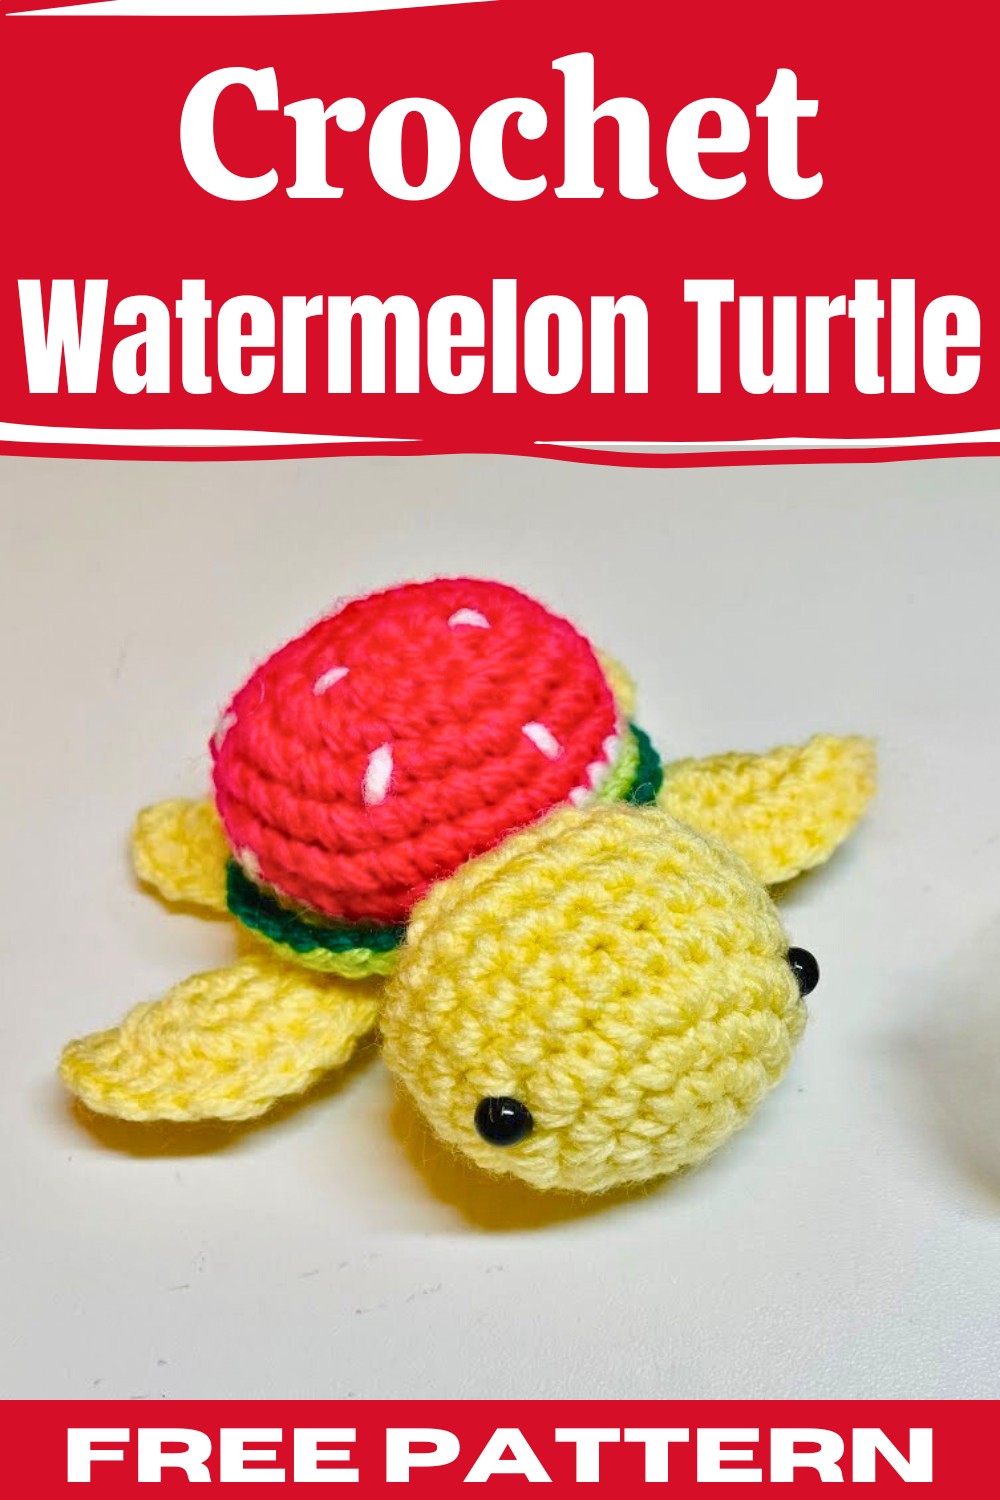
Crochet Watermelon Turtle Tutorial for Beginners
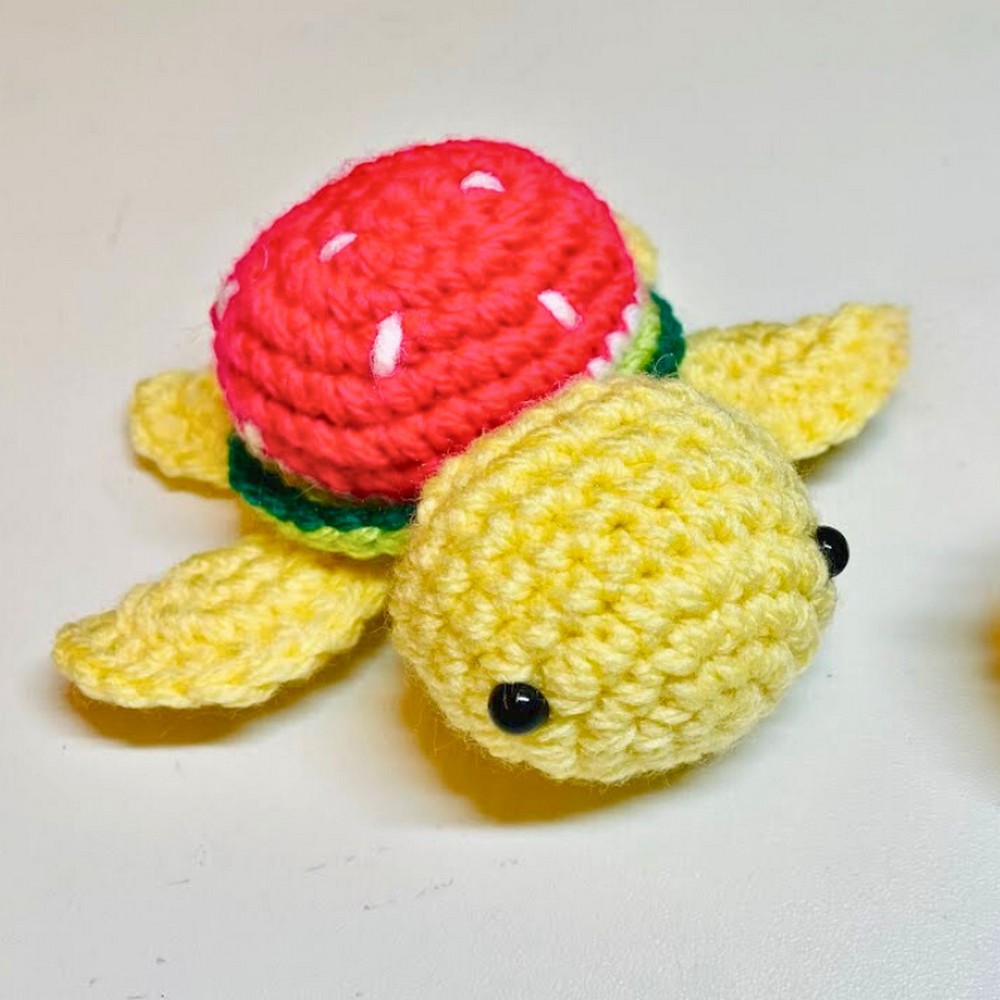
The Crochet Watermelon Turtle is a delightful and colorful project perfect for summer. This charming design combines the vibrant colors of a watermelon with the endearing shape of a turtle, making it a fun and engaging project for crocheters. The blend of green, pink, and black for the rind, flesh, and seeds showcases a playful and refreshing theme.
Materials and Abbreviations
Necessary Materials:
- Yarn: Medium weight yarn in green, pink, and black
- Crochet Hook: Size 3.5mm (E) or appropriate size for yarn
- Stuffing: Polyester fiberfill
- Eyes: Safety eyes or black yarn for embroidering eyes
- Needle: Tapestry needle for sewing pieces together
- Scissors
Abbreviations:
- ch: chain
- sl st: slip stitch
- sc: single crochet
- dec: decrease (sc2tog)
- inc: increase (2 sc in next stitch)
- st: stitch
- rnd: round
Pattern Notes:
- Work in continuous rounds unless otherwise noted
- Use a stitch marker to keep track of the beginning of each round
Design Uses and Shape
The Crochet Watermelon Turtle is not just a pleasant decorative piece but also serves as a cuddly toy for children and a unique gift item. Its rounded, dome-shaped shell perfectly mimics the look of a watermelon, complete with tiny black seeds, and is complimented by cute, small flippers, making it both realistic and whimsical.
Step-by-Step Instructions
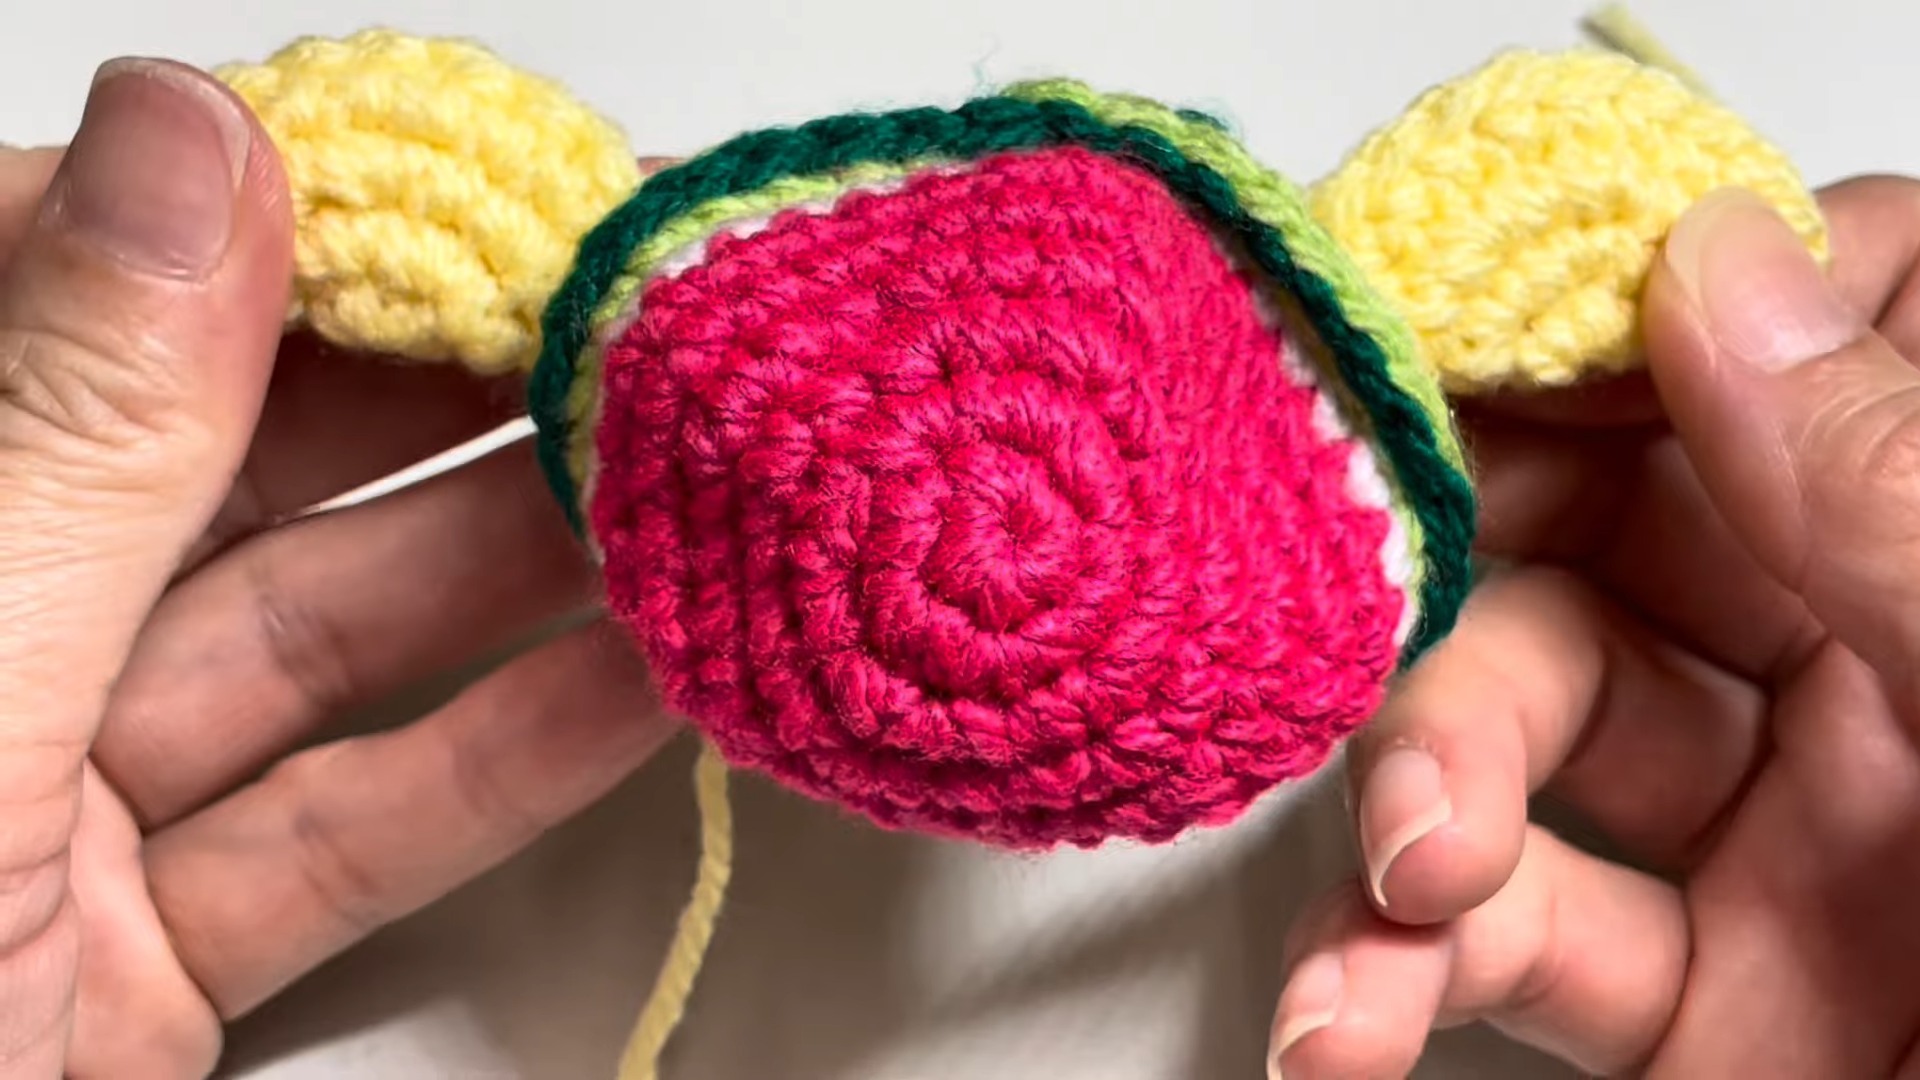
Turtle Shell (Watermelon Part)
- Pink Yarn (Watermelon Flesh):
- Rnd 1: Magic ring, 6 sc (6)
- Rnd 2: 2 sc in each st around (12)

-
- Rnd 3: [sc, inc] around (18)
- Rnd 4: [2 sc, inc] around (24)
- Rnd 5: [3 sc, inc] around (30)
- Rnd 6: [4 sc, inc] around (36)
- Rnd 7: [5 sc, inc] around (42)
- Rnd 8: [6 sc, inc] around (48)
- Rnd 9: [7 sc, inc] around (54)
- Rnd 10: [8 sc, inc] around (60)
- Change to Green Yarn (Watermelon Rind)

-
- Rnd 11: sc in each st around (60)
- Rnd 12: In back loops only, sc in each st around (60)
- Rnd 13: [8 sc, dec] around (54)
- Rnd 14: [7 sc, dec] around (48)
- Rnd 15: [6 sc, dec] around (42)
- Rnd 16: [5 sc, dec] around (36)
- Rnd 17: [4 sc, dec] around (30)
- Rnd 18: [3 sc, dec] around (24)
- Rnd 19: [2 sc, dec] around (18)
- Stuff with fiberfill

-
- Rnd 20: [sc, dec] around (12)
- Rnd 21: [dec] around (6)
- Fasten off, leaving a long tail to sew the hole closed
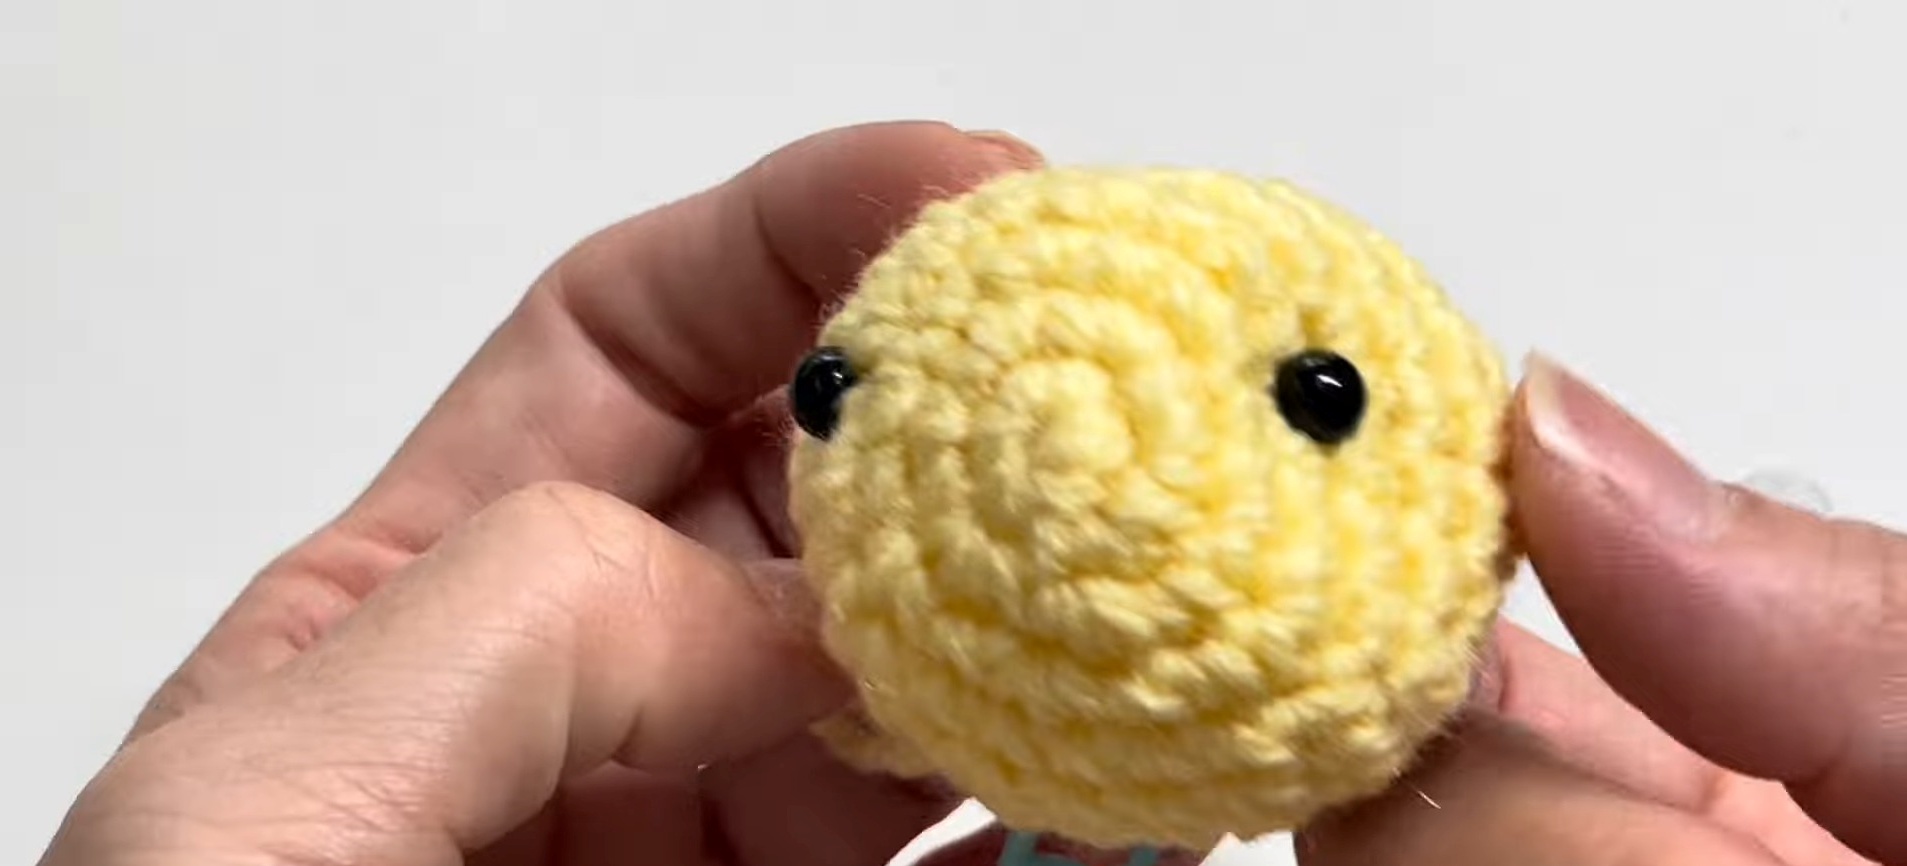
Turtle Head
- Green Yarn:
- Rnd 1: Magic ring, 6 sc (6)

-
- Rnd 2: 2 sc in each st around (12)
- Rnd 3: [sc, inc] around (18)
- Rnd 4-7: sc in each st around (18)
- Rnd 8: [sc, dec] around (12)
- Stuff lightly
- Rnd 9: [dec] around (6)

-
- Fasten off, leaving a long tail to sew to the shell
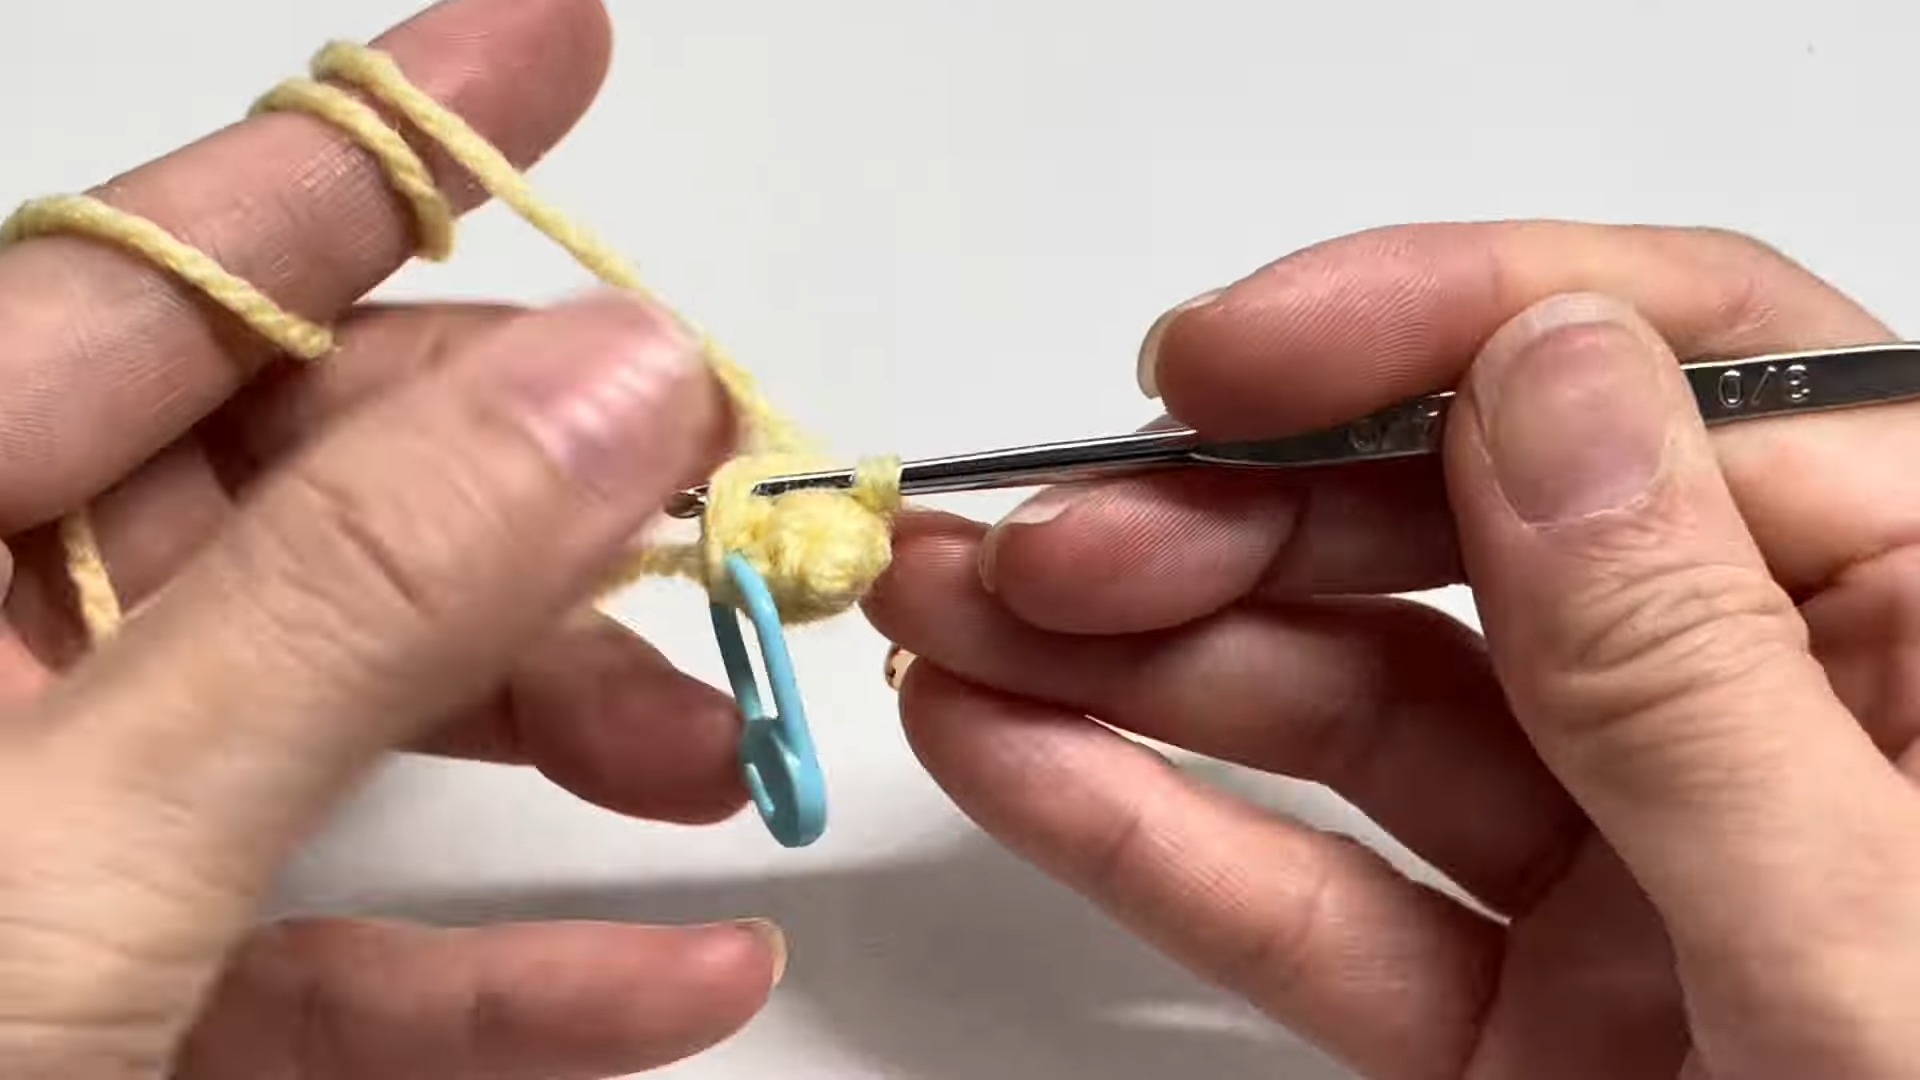
Turtle Flippers (Make 4)
- Green Yarn:
- Rnd 1: Magic ring, 6 sc (6)
- Rnd 2: [sc, inc] around (9)
-
- Rnd 3-4: sc in each st around (9)
- Fasten off, leaving a long tail to sew to the shell
Turtle Tail
- Green Yarn:
- Rnd 1: Magic ring, 4 sc (4)
- Rnd 2-3: sc in each st around (4)
-
- Fasten off, leaving a long tail to sew to the shell
Assembly
- Attach the head to the front of the shell using the tail from the head.

- Sew the two front flippers to each side of the shell.
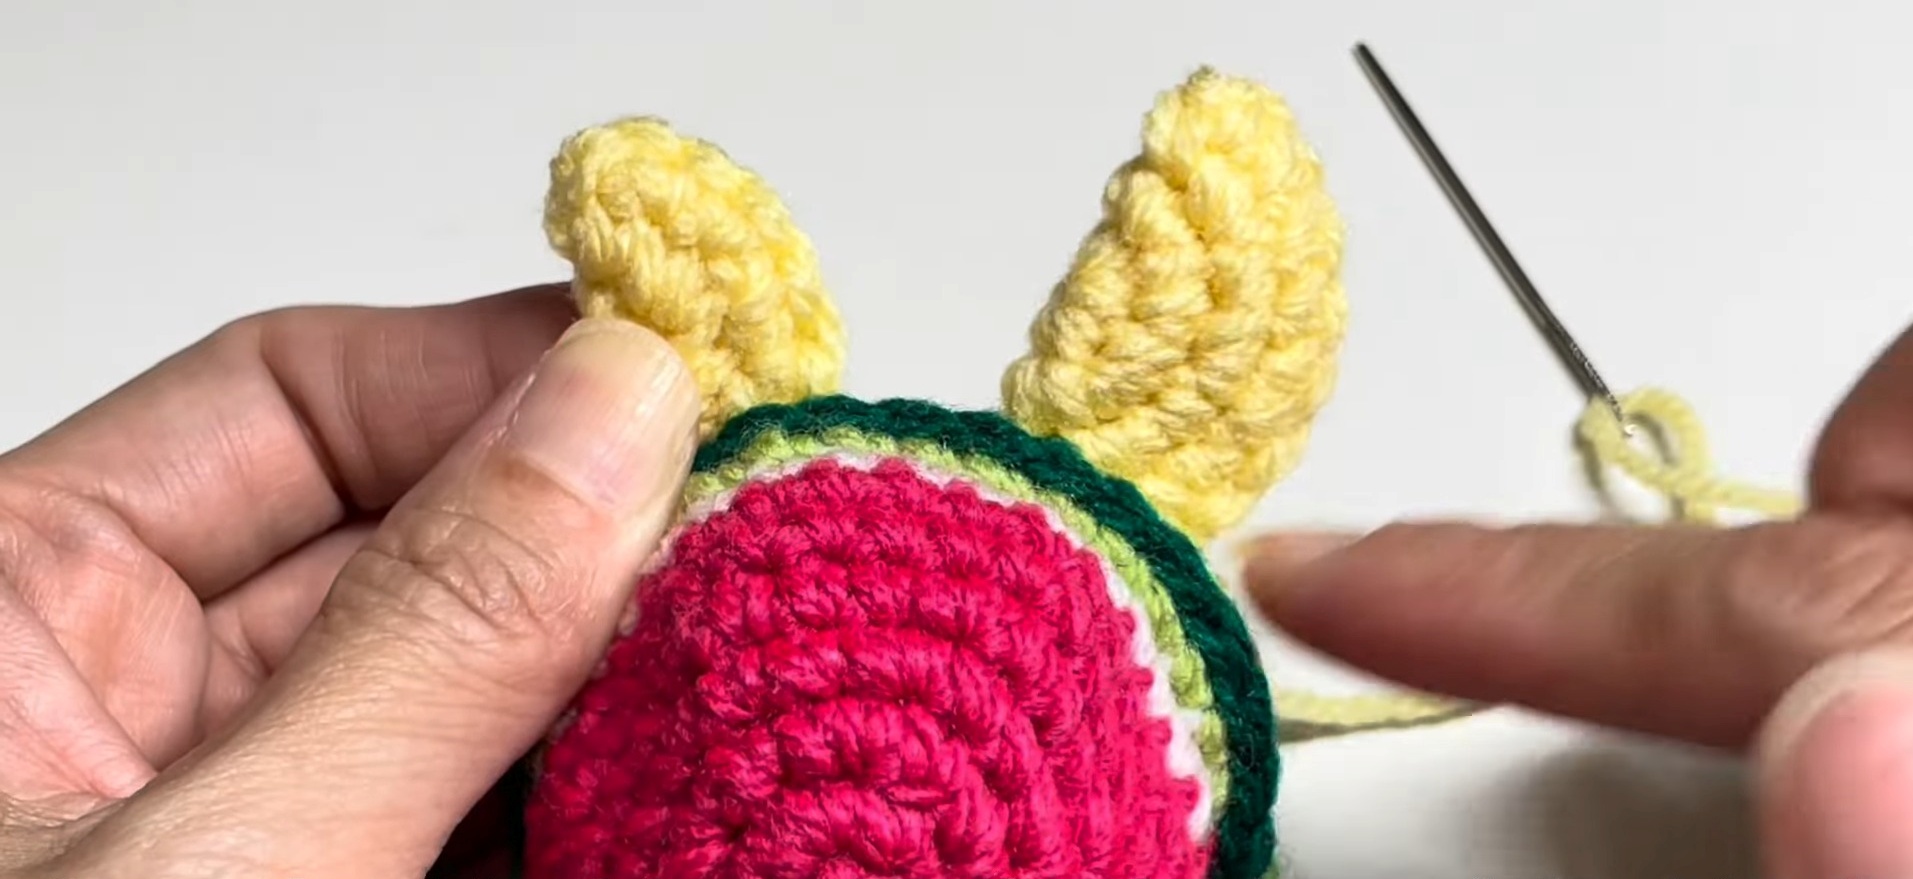
- Attach the two back flippers to each side of the shell near the bottom.
- Sew the tail in the center-back of the shell.

- Embroider or attach safety eyes to the head.
Credit Heavenly Crochet Amigurumi
Conclusion
Congratulations! You have now completed your Crochet Watermelon Turtle. This adorable and unique project is sure to bring summer vibes to any space. Perfect as a gift or a decorative item, your new Watermelon Turtle will be loved by all. Happy crocheting!